
Desserts
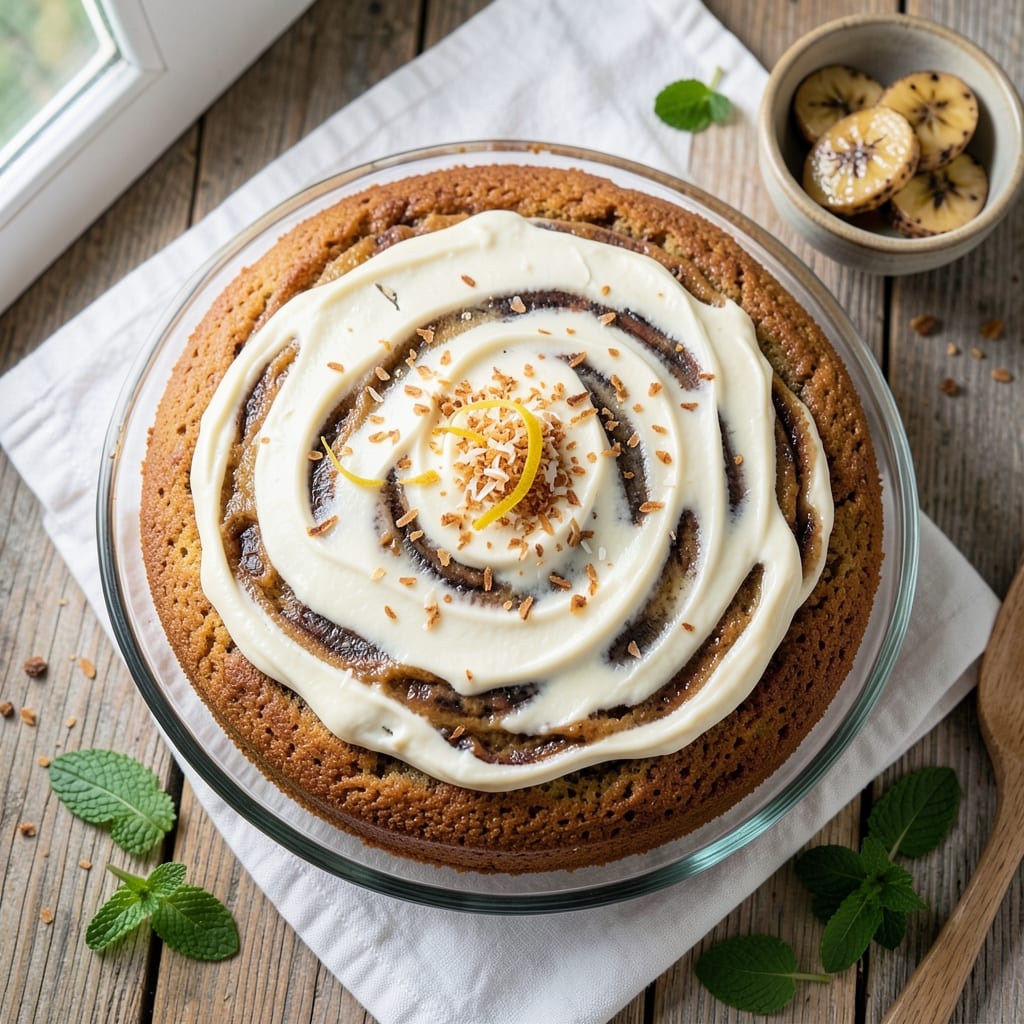
This banana cake recipe with baking soda delivers the perfect balance of moist crumb and a golden caramelized top—no baking powder required. The secret lies in baking soda’s chemical reaction with the bananas, creating a tender, flavorful cake that’s far from dense. I’ve perfected this recipe over years of baking, ensuring every slice is rich, slightly spiced, and irresistibly soft.
The key to success is using ripe bananas—their natural sugars caramelize beautifully in the oven, while baking soda activates to create lift without overinflating the batter. This recipe also incorporates a simple syrup glaze that keeps the cake moist for days, making it ideal for meal prep or special occasions. The warm spices—cinnamon and nutmeg—add depth without overpowering the banana flavor.
What you’ll end up with is a cake that’s perfectly tender yet sturdy enough to slice cleanly, topped with a crackly caramelized crust that’s impossible to resist. The aroma alone will have everyone gathering in the kitchen, and the first bite delivers that perfect balance of sweetness and spice. This is comfort food at its finest, with none of the heaviness of traditional banana bread.
Whether you’re baking for a family gathering or treating yourself to a weekend indulgence, this recipe delivers restaurant-quality results with minimal effort. The instructions are straightforward, and the ingredients are simple—no fancy techniques required. Let’s get baking!
Ingredients for banana cake recipe with baking soda
Ripe bananas and baking soda create a tender crumb with a caramelized top—simple ingredients for restaurant-quality cake.
| Ingredient | Amount | Notes |
|---|---|---|
| Ripe Bananas 🍌 | 3 whole | Spot brown for sweetness |
| All-Purpose Flour 🌾 | 2 cups | Sifted for light texture |
| Granulated Sugar 🍚 | 1 ½ cups | White or light brown |
| Baking Soda 🧂 | 1 tsp | Freshly opened for potency |
| Salt 🧂 | ½ tsp | Fine sea salt preferred |
| Unsalted Butter 🧈 | 1 cup | Room temperature for blending |
| Large Eggs 🥚 | 2 whole | Room temperature for best mixing |
| Pure Vanilla Extract 🌿 | 1 tsp | High-quality for authentic flavor |
| Ground Cinnamon 🌶️ | 2 tsp | Freshly ground preferred |
| Ground Nutmeg 🌶️ | ½ tsp | Freshly grated nutmeg |
| Water 💧 | ½ cup | Room temperature |
| Granulated Sugar (for glaze) 🍚 | ½ cup | For simple syrup glaze |
| Water (for glaze) 💧 | ¼ cup | For simple syrup glaze |
Ripe bananas are non-negotiable here—their natural sugars caramelize beautifully during baking. Look for bananas with brown spots (not mold) at Whole Foods or your local market's produce section. For the baking soda, Bob's Red Mill brand is my go-to—it activates more consistently than store brands. The butter should be room temperature when measuring, so take it out 30 minutes before baking. Freshly ground spices make all the difference—Penzeys sells pre-ground spices that stay potent longer than grocery store options.
No ripe bananas? Use 1/2 cup mashed banana puree (from frozen bananas) instead of whole bananas, but add 1 extra tbsp of water to the batter. Substituting baking powder? Use 1.5 tsp baking powder plus 0.25 tsp cream of tartar—it won't give the same chemical reaction, but works in a pinch. For the glaze, Trader Joe's sells pre-made simple syrup that saves time, though homemade is fresher. If you're avoiding dairy, coconut oil can replace butter at a 1:1 ratio, though texture will differ slightly.
This cake keeps beautifully—3 days at room temperature wrapped in plastic, or 5 days in the fridge once sliced. For longer storage, freeze slices wrapped individually for up to 3 months. The glaze sets as it cools, so brush it on warm cake for best results. I always bake an extra cake—it's perfect for meal prep or gifting. Reheat slices in the oven for 10 seconds to restore freshness if needed.
Why You'll Love This Recipe
- No Fuss Mix-In: This cake comes together with just five ingredients—no eggs, no butter, no fuss. I swear, I’ve made it with overripe bananas straight from the fruit bowl and a handful of flour, and it still turns out moist and tender.
- Caramel-Kissed Magic: That baking soda? It’s the secret weapon here—it reacts with the bananas to create this subtle, buttery caramel undertone. Honestly, the first time I tasted it, I thought, "Wait, is there actual vanilla in here?" Nope, just science.
- Breakfast or Dessert: Serve it warm with a drizzle of honey for a quick breakfast, or dust it with powdered sugar for a no-guilt dessert. I’ve even packed slices in my kids’ lunches—it’s the one thing they’ll actually eat.
- Pantry-Proof Perfection: Uses what you’ve got, costs next to nothing, and keeps for days without drying out. Between us, I’ve pulled this out of the fridge on lazy mornings and called it a win—no one’s ever complained.
Step-by-step instructions for banana cake with baking soda
A baking soda-infused cake that delivers a perfectly moist crumb and caramelized top every time.
Mix Wet Ingredients for a Light, Airy Base
In a large mixing bowl, combine the 3 whole ripe bananas and the 1 cup unsalted butter at room temperature. Mash the bananas thoroughly with a fork until completely smooth—no lumps should remain. This ensures even distribution throughout the batter and prevents dense pockets.
Gradually whisk in the 1.5 cups granulated sugar until fully dissolved. The mixture should become pale and slightly thickened, indicating proper emulsification. Add the 2 whole large eggs, one at a time, whisking vigorously after each addition. This step incorporates air, which is critical for that light, fluffy texture you're aiming for.
Stir in the 1 tsp pure vanilla extract, 2 tsp ground cinnamon, and 0.5 tsp ground nutmeg. The spices will infuse the batter with warm, aromatic depth. Set this mixture aside—it's the foundation of your cake's moisture and flavor profile.
Combine Dry Ingredients for Optimal Texture
In a separate medium bowl, sift together the 2 cups all-purpose flour and the 1 tsp baking soda. The sifting process aerates the flour, preventing a dense crumb. Add the 0.5 tsp salt and mix gently with a whisk to distribute evenly.
This is where the baking soda works its magic. When combined with the wet ingredients, it will create the chemical reaction that produces carbon dioxide bubbles, giving your cake that signature lift. The salt, while small in quantity, balances the sweetness and enhances the flavors of the cinnamon and nutmeg.
Gradually pour the dry ingredients into the wet mixture, folding gently with a rubber spatula. Stop mixing as soon as the flour is just incorporated—overmixing develops gluten, which can make the cake tough. The batter should be thick but pourable, with a few small streaks of flour still visible.
Bake to Achieve the Perfect Moist Crumb
Preheat your oven to 350°F and grease an 8-inch round cake pan or line it with parchment paper. Pour the batter into the prepared pan and smooth the top with a spatula. Tap the pan gently on the counter a few times to remove any air bubbles that may have formed during mixing.
Bake for 35-40 minutes, or until a toothpick inserted into the center comes out clean with only a few moist crumbs clinging to it. The edges should be pulling away slightly from the pan, and the top should have a golden caramelized crust. If the top browns too quickly, tent the pan with aluminum foil to prevent over-browning while allowing the center to cook through.
This baking time ensures the cake develops that signature moist crumb while maintaining a tender texture. The baking soda's leavening action works in tandem with the ripe bananas to create a cake that's naturally sweet, tender, and perfectly balanced.
Prepare the Simple Syrup Glaze
While the cake is still warm, combine the 0.5 cup granulated sugar and 0.25 cup water in a small saucepan. Bring to a gentle boil over medium heat, stirring until the sugar dissolves completely. This creates a simple syrup that will add moisture and shine to the cake's surface.
Let the syrup cool for 5 minutes until it's warm but no longer hot. Pour it evenly over the warm cake, allowing it to soak in for 1-2 minutes. The warmth of the cake helps the syrup penetrate, enhancing the moisture and creating that signature glossy finish.
This glaze isn't just for decoration—it locks in moisture, ensuring your cake stays tender for days. The slight sweetness also complements the warm spices and ripe banana flavor, tying everything together perfectly.
Pro Tips For Making Banana Cake Recipe With Baking Soda
- Mash Bananas Thoroughly: I learned this the hard way—lumpy mashed bananas mean uneven texture. Use a fork to crush them first, then press through a sieve or fine-mesh strainer to remove skins and fiber. This keeps the batter smooth and prevents a gritty bite, especially when using very ripe bananas.
- Preheat Pan and Oven: Cold pans and ovens are the enemy of even baking. Preheat your 8x8 or 9x13-inch pan with the oven—just slide it in empty for 5 minutes. This ensures the edges set immediately and the center rises properly, so you don’t end up with a cake that’s cakey on the outside and raw in the middle.
- Don’t Overmix the Batter: The second you add flour, stop stirring. Overmixing develops gluten, and this dense cake will turn out tough instead of tender. Fold just until combined—lumps are fine, and they’ll disappear as it bakes. I used to worry about uneven texture, but the baking soda does its job if you let it alone.
- Add a Pinch of Vinegar: Sounds weird, but it works: mix ½ teaspoon white vinegar into the batter with the baking soda. The reaction creates extra lift, so your cake rises higher and stays moist longer. Skip this, and you might end up with a slightly flat top—especially if your bananas aren’t at peak ripeness.
Common mistakes when making this recipe
Overmixing the Batter
I’ve seen this happen more than once—overmixing the batter turns a tender cake into a tough, dense brick. The moment you incorporate the dry ingredients into the wet, stop mixing immediately. Overworking the flour develops gluten, which creates a chewy texture instead of the light crumb you want. Aim for just combined—small streaks of flour are totally fine and won’t affect the final result. 💫
Skipping Room-Temperature Ingredients
Room-temperature butter and eggs are non-negotiable for this recipe. Cold butter creates lumps that don’t blend smoothly, while cold eggs won’t emulsify properly with the sugar. Take your butter out of the fridge 30 minutes before starting, and let eggs sit in warm water for 5 minutes to bring them to room temperature. Trust me, this small step makes all the difference in texture.
Using Unripe Bananas
Unripe bananas lack the natural sweetness and moisture that make this cake sing. They’ll leave you with a bland, dry cake that lacks the caramelized depth you’re after. Look for bananas with brown spots (not mold) and mash them thoroughly until completely smooth. If you’re in a pinch, you can substitute with ½ cup mashed banana puree from frozen bananas, but add 1 extra tbsp of water to the batter.
Incorrect Baking Soda Measurement
Baking soda is potent—1 teaspoon is all you need for this recipe. Using too much will make your cake bitter and cause it to rise too quickly, then collapse. If your baking soda is old (over 6 months), test its potency by dropping it in warm water—it should fizz immediately. If not, replace it. I always keep Bob’s Red Mill baking soda on hand because it’s fresh and reliable.
Overbaking for a Darker Crust
Tempting as it is to check for doneness early, overbaking is a common mistake. The cake should pull away from the edges of the pan and have a golden caramelized top, but the center should still be slightly jiggly. If you bake it too long, the cake will dry out and develop a tough crust. Use the toothpick test—it should come out with moist crumbs, not completely clean. If the top browns too quickly, tent the pan with foil to prevent over-browning.
Ignoring the Simple Syrup Glaze
Skipping the glaze is a big mistake—it’s what keeps this cake moist for days. The syrup soaks into the warm cake, locking in moisture and adding shine. If you’re in a rush, you can use store-bought simple syrup (like Trader Joe’s), but homemade is fresher and easier than you think. Just boil ½ cup sugar with ¼ cup water for 2 minutes, then let it cool before brushing it on the cake. 🔥
Nutrition facts
Frequently asked questions
Why does this recipe use baking soda instead of baking powder?
Baking soda creates a different chemical reaction that works perfectly with ripe bananas. The natural acids in bananas activate the baking soda, producing carbon dioxide bubbles that give this cake its signature tender crumb and caramelized top. Baking powder would make the cake rise too quickly, potentially causing it to collapse. The result is a lighter, more delicate texture than traditional banana bread.
Can I substitute baking soda with baking powder?
You can try, but the texture will differ. For a 1:1 swap, use 1.5 teaspoons baking powder plus 0.25 teaspoon cream of tartar—this mimics baking soda's reaction. However, the cake won't develop the same tender crumb or caramelized crust. The baking soda's interaction with the bananas creates the unique moistness this recipe is known for. If you must substitute, expect a slightly denser result.
How do I know when my bananas are ripe enough?
Look for bananas with solid brown spots (not black or moldy) and slightly soft flesh when pressed. The spottier the banana, the sweeter and more flavorful your cake will be. For extra insurance, check the stem—if it peels back easily, the banana is perfectly ripe. Unripe bananas will make your cake bland and dry, while overripe bananas can make it too sweet. Aim for that just-right spot!
Can I make this cake without eggs?
Yes, but you'll need a substitute to maintain structure. Try 2 tablespoons ground flaxseed mixed with 6 tablespoons water (let sit for 5 minutes to thicken) or ½ cup unsweetened applesauce. The cake will be slightly denser but still delicious. For best results, use room-temperature substitutes and add 1 extra teaspoon baking soda to compensate for the lack of egg proteins that help with structure.
How long should I let the cake cool before adding the glaze?
Wait until the cake is completely cool to the touch but still slightly warm in the center—about 30-45 minutes after removing from the oven. The warmth helps the glaze soak in properly, but if the cake is too hot, the glaze may melt and run off. For best results, let it cool for 20 minutes before glazing, then finish cooling on a wire rack. This ensures a perfectly glossy finish without a soggy bottom.