
Desserts
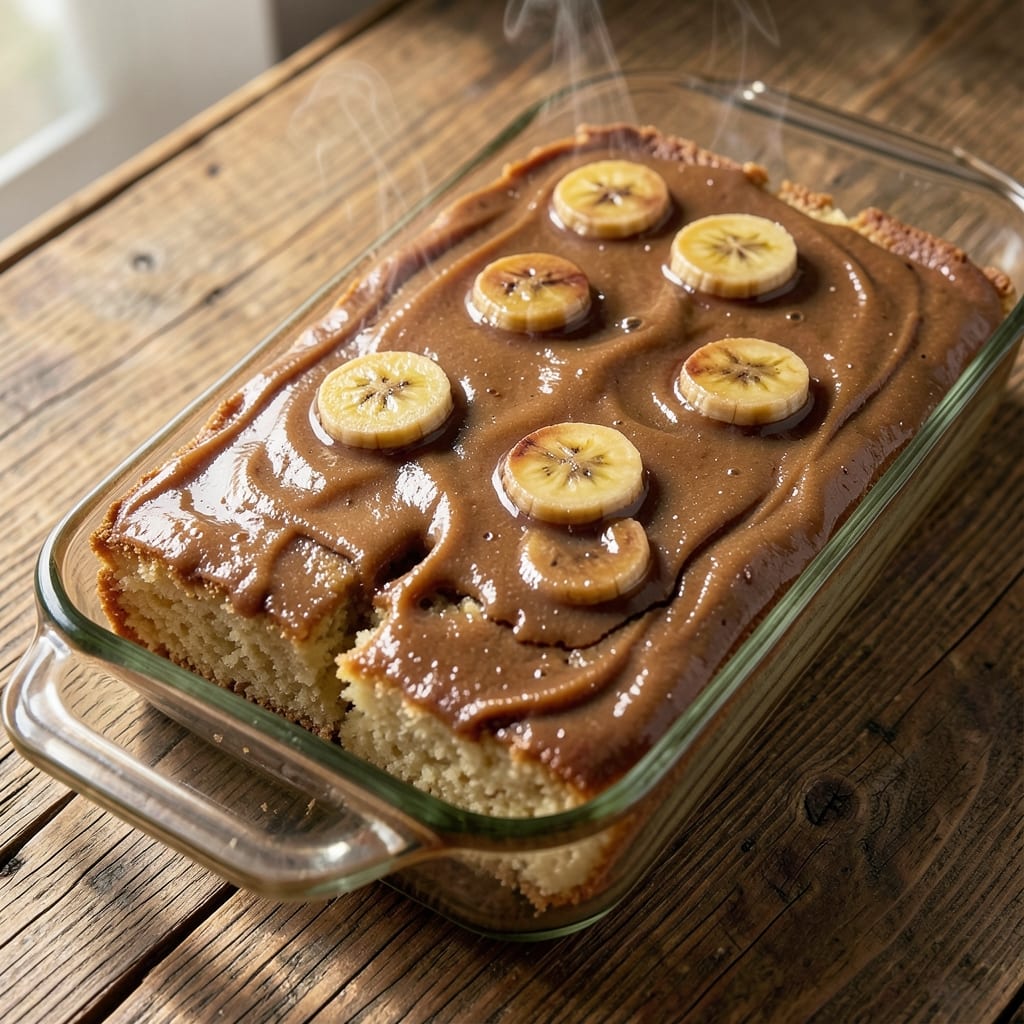
This banana cake bars recipe delivers the perfect balance of fudgy edges, crispy top, and moist center—all in one pan with minimal effort. 💛 The secret lies in combining ripe bananas with a touch of cinnamon and brown sugar, creating layers of flavor that satisfy any sweet tooth without requiring fancy techniques.
What makes these bars exceptional is their versatility—whether you prefer a classic vanilla flavor or want to add chocolate chips, walnuts, or a cream cheese glaze, they adapt effortlessly. The recipe uses simple pantry staples and requires just 30 minutes of active time, making it ideal for busy weeknights or weekend baking projects.
The result is a golden, crackly top with a tender, cake-like interior that stays moist for days. Each bite offers a mix of sweet banana flavor and buttery richness, making these bars perfect for sharing with friends, packing for lunches, or enjoying as a quick dessert.
Best of all, they bake at a standard 350°F for about 25-30 minutes, ensuring foolproof results every time. Whether you're a seasoned baker or just starting out, this recipe guarantees a crowd-pleasing treat that feels like a homemade hug.
Ingredients for banana cake bars
Sweet, buttery, and packed with banana goodness—these bars are pure comfort in every bite!
| Ingredient | Amount | Notes |
|---|---|---|
| Ripe Bananas 🍌 | 3 large | Mashed, about 1.5 cups total |
| All-Purpose Flour 🌾 | 2 cups | Spooning from cup, not scooping |
| Granulated Sugar 🍚 | 1 cup | White sugar preferred |
| Brown Sugar 🍚 | ½ cup | Packed firmly |
| Unsalted Butter 🧈 | ½ cup | Cold, cubed for crispy top |
| Large Eggs 🥚 | 2 whole | Room temperature |
| Vanilla Extract 💧 | 1 tbsp | Pure extract preferred |
| Baking Powder 🌶️ | 1 tsp | Aluminum-free preferred |
| Ground Cinnamon 🌿 | 1 tsp | Freshly ground if possible |
| Salt 🧂 | ½ tsp | Fine sea salt |
| Chocolate Chips 🍫 | 1 cup | Semi-sweet or milk chocolate |
| Walnuts 🌰 | ½ cup | Chopped, optional topping |
| Powdered Sugar 🍚 | ¼ cup | For dusting top |
Ripe bananas are non-negotiable here—look for those with black spots and soft spots when pressed. Trader Joe's and Whole Foods usually have the best selection of perfectly ripe ones. I always grab 2-3 extra bananas since they're the star. For the flour, King Arthur or Gold Medal brands work best—they give that tender crumb. The butter needs to be cold for that perfect crackly top, so take it out of the fridge right before measuring. Pro tip: use a food scale for accurate measurements if you're not comfortable eyeballing the bananas.
No ripe bananas? Cooked banana puree works in a pinch—simmer peeled bananas with a splash of water until soft. Swap chocolate chips for white chocolate or butterscotch chips if you're feeling adventurous. The walnuts are optional but add that perfect crunch—toasted for 3-5 minutes takes them to the next level. No vanilla extract? Vanilla sugar or even a pinch of vanilla bean powder will do. For the brown sugar, don't pack it too tightly or you'll end up with dry bars. And if you're short on powdered sugar for dusting, granulated sugar in a fine-mesh sieve works just as well.
These bars taste even better the next day—honestly, they keep for 5 days in an airtight container at room temperature. For longer storage, freeze them for up to 3 months. I like to wrap individual bars in parchment paper before freezing so they don't stick together. The chocolate chips might melt slightly during baking, but that's what makes them extra gooey. If you're making these ahead for a party, bake them a day in advance—they'll be even more flavorful and easier to slice neatly.
Why You'll Love This Recipe
- No Mash Required: I’ll be real—this recipe only asks for ripe bananas, and I’m not talking about the slightly green ones. The darker the spots, the sweeter the flavor, and the less sugar you’ll need. Plus, no food processor or fancy tools—just a fork and your hands.
- Caramel-Kissed Magic: That combo of brown sugar and butter? It’s what turns these into something dangerously addictive. The bars have this perfect balance—moist from the mashed bananas, with a crispy edge that’s almost like a cookie. Honestly, I’ve caught myself sneaking slices straight from the pan.
- Lunchbox Legend: Between us, these are my go-to for school lunches or office snacks. Cut into squares, they’re sturdy enough to handle a backpack but still taste fresh. And if you’re short on time? Bake a batch Sunday, and you’ve got breakfast or dessert covered all week.
- Pantry Stash Winner: You’re already using basics—flour, sugar, butter—and ripe bananas are basically free if you’re buying them anyway. No fancy ingredients, no waste (unless you eat them all first). Leftovers? They travel well, freeze perfectly, and somehow taste even better the next day. My secret weapon for lazy days.
Step-by-step instructions for banana cake bars
Here's the magic behind those irresistible fudgy edges and crispy tops—easy, foolproof, and all in one pan!
👨🍳 Step 1: Mash the Bananas and Mix Wet Ingredients
Start by mashing the 3 large ripe bananas in a medium bowl until completely smooth—no lumps allowed. This is your base, and you want it silky. In a separate large bowl, cream together the 0.5 cup unsalted butter (cold, cubed) with 1 cup granulated sugar and 0.5 cup brown sugar on medium speed until light and fluffy, about 3-4 minutes. You'll see it nearly double in volume—that's how you know it's ready.
Add the 2 whole large eggs, one at a time, mixing well after each. Then stir in the 1 tbsp vanilla extract and the mashed bananas. The mixture should be thick and smooth, like a rich cake batter. I like to give it a quick taste here—sweet, banany, and ready for the dry ingredients!
👨🍳 Step 2: Combine Dry Ingredients and Fold in Add-Ins
In a separate bowl, whisk together the 2 cups all-purpose flour, 1 tsp baking powder, 1 tsp ground cinnamon, and 0.5 tsp salt. This is your dry mix, and it's important to sift it lightly if you can—it keeps the bars tender. Gradually add the dry ingredients to the wet mixture, mixing on low speed just until combined. Overmixing here will make your bars tough, so stop as soon as you see no more flour streaks.
Now fold in the 1 cup chocolate chips and 0.5 cup chopped walnuts by hand using a silicone spatula. Be gentle—you want them evenly distributed but not crushed. If you're feeling fancy, save a few chocolate chips for the topping later. The batter should be thick and sticky, almost like cookie dough. This is the moment you'll taste the magic happening!
🔥 Step 3: Bake to Golden Perfection
Preheat your oven to 350°F and line a 9x13-inch baking pan with parchment paper, leaving an overhang on the sides for easy removal. Spread the batter evenly into the pan—use a spatula to smooth it out so the edges are slightly thicker than the center. This is where those fudgy edges come from! Bake for 25-30 minutes, until the edges are golden brown and a toothpick inserted in the center comes out clean (or with a few moist crumbs).
Here's the thing—don't overbake! The bars will continue cooking as they cool, and you want them tender, not dry. When you pull them out, the center might still look slightly underdone, but that's perfect. Let them cool in the pan for 10 minutes before transferring to a wire rack to cool completely.
🥘 Step 4: Add the Crunchy Topping
While the bars are still warm (but not hot), sprinkle the 0.25 cup powdered sugar evenly over the top. Use a fine-mesh sieve for an even dusting—this gives you that classic "snow on top" look. If you saved any chocolate chips earlier, sprinkle those on now too. For extra crunch, press the chopped walnuts gently into the top so they stick.
Let the bars cool completely before slicing—this ensures clean cuts and prevents them from falling apart. Once fully cooled, use a sharp knife or pizza cutter to slice into 16 bars. Each one will have that perfect balance of fudgy edges, tender middle, and crispy top. Trust me, the first bite is worth the wait!
Pro Tips For Making Banana Cake Bars
- MASH THE BANANAS WELL: I learned this the hard way—lumpy banana puree means uneven texture. Use a fork first to break them up, then press through a strainer or mash against the side of the bowl until smooth. No chunks, no regrets.
- BROWN THE BUTTER FIRST: Skip the melted butter shortcut—browning it adds a nutty depth that cuts through the sweetness. Cook 3 tablespoons in a pan until it smells like caramel and has golden flecks, then cool slightly before mixing. (Yes, it takes 5 extra minutes, but the flavor makes a real difference.)
- DON’T OVERMIX THE BATTER: Once you fold in the flour, stop after 15 seconds. Overmixing develops gluten, and these bars turn out dense instead of tender. Just combine until just combined—like stirring icing, not kneading dough.
- BAKE UNTIL TOOTHPICK COMES OUT CLEAN: The edges might look done while the center stays gummy. Insert a toothpick in the thickest part—if it’s sticky with moist crumbs, bake 3–5 more minutes. (I used to pull them too soon, and they’d taste underbaked.)
Flavor customization for these flavors
Spiced Variations
Swap the cinnamon for 1 tsp pumpkin pie spice to add warm notes of nutmeg and cloves—perfect for fall baking. Or try ½ tsp cardamom for a Middle Eastern twist that pairs beautifully with the chocolate chips. I find ½ tsp ginger gives a subtle kick that balances the sweetness wonderfully. 🌶️
Chocolate Lover's Twist
Double the chocolate chips to 2 cups and replace walnuts with ½ cup toasted pecans for a richer, more decadent version. For a molten center effect, fold in ½ cup white chocolate chips alongside the dark ones. I’ve also had success adding 2 oz chopped dark chocolate (60% cocoa) to the batter for extra depth. 🍫
Frosting Options
Drizzle with cream cheese frosting made from 4 oz softened cream cheese, 2 tbsp butter, and 1 cup powdered sugar mixed until smooth. For a lighter touch, use ½ cup Greek yogurt whipped with 1 tbsp honey and a pinch of vanilla. The yogurt version keeps the bars from feeling too heavy. ✨
Fruit Additions
Fold in ½ cup chopped dried cranberries or ½ cup raisins for a chewy contrast. Fresh fruit works too—try ½ cup diced apples (tossed in lemon juice) or ½ cup blueberries for a burst of juiciness. I like to add these right before baking so they stay vibrant. 🍎
Nutty Upgrades
Swap walnuts for ½ cup chopped pecans or ½ cup almonds for a different texture. Toast the nuts first for 3-4 minutes at 350°F to enhance their flavor. For a crunchier topping, press ½ cup crushed graham crackers into the warm bars before dusting with powdered sugar. 🌰
Gluten-Free Adaptation
Replace the all-purpose flour with a 1:1 gluten-free baking blend (like Bob’s Red Mill) and add ½ tsp xanthan gum to improve texture. For extra moisture, reduce the flour to 1¾ cups and add ¼ cup applesauce to the wet ingredients. The bars will still be tender but slightly denser. 💪
Nutrition facts
Frequently asked questions
Why do my banana cake bars turn out dry?
Overbaking is the #1 culprit! These bars are best when the center looks slightly underdone at 25-30 minutes. They'll firm up as they cool. Also check your bananas—overripe (mushy) ones add too much moisture. For extra moisture, try adding 2 tbsp sour cream or 1 tbsp melted butter to the batter.
Can I make these bars without eggs?
Replace the 2 eggs with either 2 tbsp ground flaxseed + 6 tbsp water (let sit 5 mins to gel) or ½ cup unsweetened applesauce. The texture will be slightly denser but still delicious. For best results, reduce the baking time by 2-3 minutes since egg substitutes can make bars cook faster.
How do I store banana cake bars?
Keep them in an airtight container at room temperature for up to 5 days—they actually taste better after the first day! For longer storage, freeze individual bars wrapped in plastic wrap for up to 3 months. Thaw at room temperature for 1-2 hours before serving. The chocolate chips may soften slightly when frozen but harden again at room temp.
What's the secret to fudgy edges?
The magic happens when you spread the batter thicker at the edges! Use a spatula to create ¼-inch thick edges while keeping the center slightly thinner. Bake at 350°F until edges are golden but center still looks slightly soft. The residual heat will finish cooking as they cool, creating that perfect fudgy texture.
Can I make these bars in a smaller pan?
Yes, but expect different textures. For a 9x9-inch pan, reduce all ingredients by 25% (about 12 bars). The bars will be thicker and more cake-like. For a 9x13-inch pan, they'll have the classic bar texture. If using a different size, bake for 15-20 minutes and check with a toothpick—don't overbake!