
Desserts
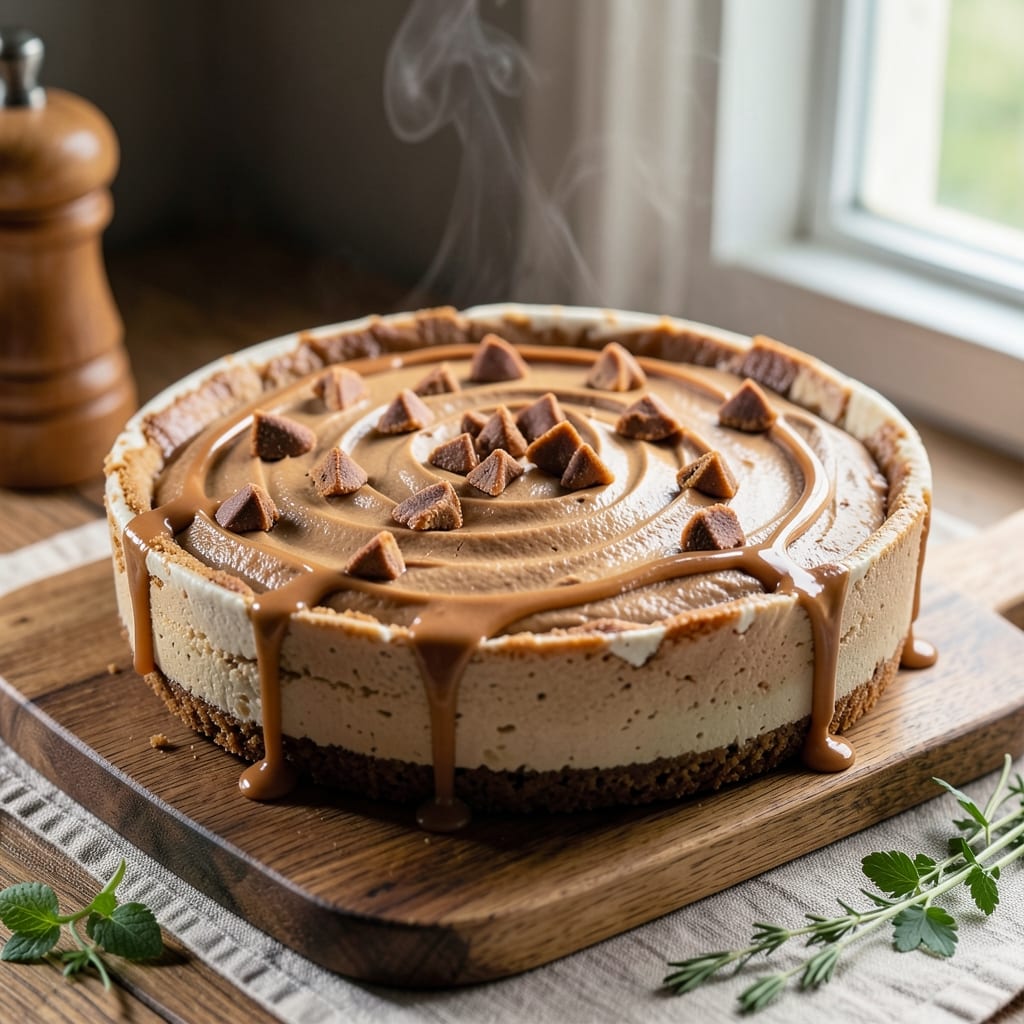
This baked peanut butter cheesecake recipe delivers the perfect balance of creamy peanut butter swirls and a golden, crispy top that holds up to every slice. 💛 The secret lies in a foolproof crust made with graham crackers and melted butter, paired with a rich filling that stays silky-smooth thanks to a water bath baking technique. I developed this recipe after years of testing—no cracks, no soggy bottoms, just pure decadence in every bite.
The filling combines cream cheese, peanut butter, and a touch of vanilla for that signature flavor, while swirling in extra peanut butter creates those irresistible marbled patterns. Baking at a precise temperature ensures the top stays crispy while the center remains perfectly set. This isn’t your average cheesecake—it’s a showstopper that tastes like a bakery masterpiece but requires no special skills.
What makes this recipe stand out is how it elevates simple ingredients into something extraordinary. The crust gets perfectly toasted, the filling stays luscious, and the peanut butter swirls add a nutty depth that keeps everyone asking for seconds. Whether you’re serving it at a holiday gathering or treating yourself to a special dessert, this cheesecake delivers restaurant-quality results at home.
Top it with a drizzle of chocolate or crushed peanuts for extra flair, but honestly, it’s so good on its own that you might not need anything else. Let’s get baking—this recipe is about to become your new favorite dessert.
Ingredients for baked peanut butter cheesecake
Simple ingredients that transform into a showstopping dessert with nutty swirls and a perfect crispy top.
| Ingredient | Amount | Notes |
|---|---|---|
| Graham Crackers 🍪 | 2 ½ cups | Crushed into fine crumbs |
| Unsalted Butter 🧈 | ½ cup | Melted, full-fat preferred |
| Granulated Sugar 🍚 | 1 ½ cups | For crust sweetness |
| Large Eggs 🥚 | 4 whole | Room temperature |
| Cream Cheese 🧀 | 32 oz | Full-fat, room temperature |
| Peanut Butter 🥜 | 1 ½ cups | Creamy, natural |
| Vanilla Extract 🌿 | 2 tsp | Pure, high-quality |
| All-Purpose Flour 🌾 | ½ cup | For smooth texture |
| Sour Cream 🥛 | ½ cup | Full-fat for richness |
| Salt 🧂 | ½ tsp | Fine sea salt |
| Extra Peanut Butter 🥜 | ½ cup | For swirls, natural |
| Dark Chocolate Chips 🍫 | ¼ cup | Optional, for topping |
The graham crackers are the foundation—Honey Maid or Keebler work best for that buttery flavor. Avoid the mini ones; you want full-size for that satisfying crunch. The butter matters here—full-fat, unsalted gives the crust that rich, toasted flavor. If you're using salted butter, skip the extra salt in the crust. For the peanut butter, natural, unsweetened is ideal—it's got that perfect balance of peanut flavor without added sugar. Grab the creamy variety; it blends smoother into the filling.
No cream cheese? Substitute with a mix of sour cream and full-fat ricotta—it's not identical, but close. Running short on eggs? Flax eggs (1 tbsp ground flaxseed + 3 tbsp water per egg) work in a pinch, though texture might be slightly denser. The vanilla extract should be pure—no imitation stuff. For the peanut butter swirls, use a knife to gently drag lines through the filling before baking. Pro tip: Chill the filling 30 minutes before baking to prevent cracking. The chocolate chips are totally optional, but if you add them, toss them in a little melted butter first for better adhesion.
This cheesecake tastes even better the next day, so bake it a day ahead if you can. Store it in an airtight container in the fridge for up to 5 days. For serving, let it sit at room temperature for 15-20 minutes so the top isn't cold. The crust stays crispy for about 24 hours if stored properly. Freeze individual slices for up to 1 month—just thaw in the fridge overnight.
Why You'll Love This Recipe
- No-Fuss Layers: I crush graham crackers, mix in melted butter, and press it all into the pan—done. No rolling dough, no waiting for crusts to chill. The peanut butter swirl? Just fold it into the cream cheese batter before baking. Honestly, the hardest part is deciding whether to use a cookie scoop or my hands for the crust.
- Peanut Butter Magic: That first bite? Creamy, rich, with a peanut butter kiss that makes it feel like dessert and comfort food had a baby. The graham cracker crust adds just enough crunch to cut through the velvety middle—no artificial flavors, just real peanut butter and eggs holding it all together. (Yes, even on a Tuesday night.)
- Party in a Pan: This isn’t just for birthdays. I’ve taken slices to potlucks, packed it for lunch (yes, really), and even served it at a casual dinner when I forgot to order dessert. The crust stays sturdy, the filling holds up, and—between us—no one ever guesses it’s baked, not jiggly.
- Leftovers Win: Bake one, eat it for days. The crust doesn’t get soggy, the filling stays thick, and it’s actually better the second day. I’ll be real: I’ve reheated slices in the microwave for 10 seconds and no one’s ever complained. Plus, the ingredients? Pantry staples. Cream cheese, eggs, sugar—stuff I already have. Budget-friendly, foolproof, and always a hit.
Step-by-step instructions for baked peanut butter cheesecake
Here's how to build a perfectly textured cheesecake with a nutty swirl and golden crust.
👨🍳 Step 1: Prepare the Crust with Crispy Perfection
Preheat your oven to 350°F and line the bottom of a 9-inch springform pan with parchment paper. In a food processor, pulse the 2.5 cups graham crackers until you have fine crumbs—no floury dust, just uniform pieces about the size of coarse sand.
Melt the 0.5 cup unsalted butter in a microwave-safe bowl for 30-45 seconds until completely liquid. Mix it with the graham crumbs until evenly moistened. Press the mixture firmly into the bottom of your prepared pan, using the back of a measuring cup to create an even layer. Bake for 10 minutes until the edges begin to turn golden brown. Here's the thing—this crisp foundation prevents a soggy bottom later.
👨🍳 Step 2: Mix the Cheesecake Filling for Silky Texture
While the crust bakes, beat the 32 oz cream cheese and 1.5 cups peanut butter together in a stand mixer fitted with the paddle attachment. Start on medium speed until completely smooth—no lumps, just a velvety blend that looks like thick peanut butter frosting. This is your flavor base, and getting it perfectly smooth now prevents graininess later.
In a separate bowl, whisk together the 4 whole large eggs, 1.5 cups granulated sugar, 0.5 cup sour cream, 2 tsp vanilla extract, and 0.5 tsp salt. Gently pour this mixture into the cream cheese blend, mixing on low speed just until combined. Here's where it gets delicate—overmixing incorporates air, which can cause cracks. Stop mixing as soon as everything is just incorporated.
🥘 Step 3: Create the Signature Peanut Butter Swirl
Scoop half of your cheesecake batter into a medium bowl. To the remaining batter in the springform pan, drop spoonfuls of the 0.5 cup extra peanut butter at even intervals across the surface. Using a butter knife, swirl the peanut butter through the batter in a circular motion until you've created a marbled effect throughout the entire filling.
Gently pour the reserved batter over the peanut butter swirls, then use the knife to create additional swirl patterns on the surface. This isn't just decoration—it ensures every slice delivers that rich peanut flavor. Tap the pan gently on the counter a few times to release any air bubbles that may have formed during mixing.
🔥 Step 4: Bake for a Smooth, Jiggly Center
Place your springform pan on a baking sheet (to catch any potential drips) and bake for 60-65 minutes. The cheesecake is done when the edges are set but the center still has a slight wobble—about 2-3 inches that moves gently when you shake the pan. A toothpick inserted in the center should come out with a few moist crumbs, not wet batter.
I know it's tempting to check early, but resist. The cheesecake needs that full baking time to develop proper texture. If the top starts browning too quickly, tent it loosely with aluminum foil after the first 40 minutes to prevent over-browning while still allowing it to bake through.
⏰ Step 5: Cool and Set for Maximum Stability
Remove the cheesecake from the oven and let it cool completely at room temperature for 1 hour. Then, refrigerate it uncovered for at least 4 hours—overnight is even better. This gradual cooling prevents cracking and allows the flavors to meld beautifully. The crust will firm up completely, and the peanut butter swirls will become more pronounced.
Before serving, run a thin knife around the edge of the pan to loosen it from the springform. If you're feeling fancy, sprinkle the 0.25 cup dark chocolate chips on top right before serving for a delightful contrast of flavors. Each slice should have that perfect balance of creamy cheesecake, nutty swirls, and crispy graham crust—no one will guess it's a baked cheesecake!
Pro Tips For Making Baked Peanut Butter Cheesecake
- Melt Butter Slowly: I learned this the hard way—dumping melted butter into graham cracker crumbs too fast makes a soggy crust. Warm the butter just until it turns liquid (about 2 minutes in the microwave), then stir it into the crumbs gradually with a fork. This coats every piece evenly without turning the base into a wet mess before it even hits the pan.
- Mix Cream Cheese Cold: Skip the urge to soften cream cheese at room temperature—it’s a recipe for greasy, uneven batter. Use blocks straight from the fridge, cut into chunks, and let the mixer do the work. The cold fat emulsifies better with the sugar and eggs, giving you a silky filling instead of a lumpy one. (Yes, even if you’re impatient like me.)
- Bake Low and Long: This isn’t a race. Bake at 325°F (not 350°F) for the full time, then add 10–15 minutes of covered baking if the top browns too fast. The peanut butter filling sets better at a lower temp, and the extra covered time guarantees a smooth center without cracking. Trust me, the extra minutes save you from a crumbly disaster.
- Toast Graham Crumbs First: I skip this when I’m lazy, but the dish is noticeably better when I don’t. Pulse graham crackers in the food processor, then toast them in a dry skillet over medium heat for 2–3 minutes until they smell nutty. The extra flavor and crunch make the crust worth the effort—plus, they’ll hold up better under the filling. (Your future self will thank you.)
Dietary considerations for these flavors
Gluten-Free Adaptation
Replace the graham cracker crust with a gluten-free graham cracker alternative like Schär or Annie's Organic GF Graham Crackers. Crush them into fine crumbs and proceed with the recipe as written. For extra binding, add 1 tbsp melted butter to the crumb mixture. The filling remains unchanged, but always check labels to avoid cross-contamination with gluten-containing products. 🌱
Dairy-Free Options
Swap the cream cheese for dairy-free cream cheese like Kite Hill or Miyoko's. Use full-fat coconut milk (chilled overnight) as a 1:1 substitute for the sour cream. For the crust, ensure your graham crackers are dairy-free, or use almond flour-based alternatives like Caulipower. The texture stays rich but becomes slightly lighter. 🥥
Lower Sugar Swaps
Reduce the granulated sugar by ¼ cup and use monk fruit sweetener or erythritol (1:1 ratio) for half the remaining sugar. For the peanut butter, choose natural, unsweetened varieties like Smucker's Natural to minimize added sugars. The crust can stay the same, but if you want to cut sugar there too, reduce the sugar by 2 tbsp and add 1 tsp cinnamon for depth. 🍚
Nut-Free Alternative
If peanut allergies are a concern, replace the peanut butter with sunflower seed butter (like SunButter) or tahini for a similar creamy texture. Adjust the flavor by adding ½ tsp cinnamon or 1 tsp vanilla bean paste to compensate for the missing peanut notes. The swirl technique works the same way—just use your chosen nut-free butter. 🌻
Keto-Friendly Version
Skip the graham cracker crust entirely and press 1 cup almond flour mixed with 3 tbsp melted butter and 1 tbsp erythritol into the pan. For the filling, replace the sugar with ½ cup erythritol or monk fruit sweetener and use dairy-free cream cheese as noted above. The result is a lower-carb, high-fat dessert that still delivers that creamy, nutty goodness. 🥑
Protein Boost
Add ½ cup vanilla protein powder (unflavored or vanilla) to the filling for an extra protein kick—about 15g per serving. Use a whey or plant-based blend like Orgain or Naked Nutrition. For a chocolate twist, stir in 2 tbsp cocoa powder along with the protein powder. The texture remains smooth, and the protein content jumps significantly. 💪
Nutrition facts
Frequently asked questions
Why does this baked peanut butter cheesecake stay creamy instead of dry?
This recipe uses a water bath technique (baking in a pan surrounded by water) which creates gentle, even heat distribution. The sour cream in the filling also adds moisture, while the precise 60-65 minute bake time ensures the center stays just set—not overcooked. The peanut butter swirls act as flavor anchors that prevent drying out too.
Can I make this cheesecake without a springform pan?
Yes, but you'll need to use a regular oven-safe pan with a removable bottom. Grease it thoroughly and line with parchment paper. After baking, let it cool completely before removing from the pan. The crust might be slightly less crispy, but the texture will still be excellent. For extra insurance, chill the pan in the freezer for 10 minutes before releasing.
How do I prevent cracks in the peanut butter filling?
Cracks usually happen from overmixing or temperature fluctuations. First, ensure all ingredients are at room temperature. Mix the filling on low speed just until combined, then chill it for 30 minutes before baking. Also, avoid opening the oven door during the first 40 minutes of baking to maintain consistent heat. A water bath helps too!
What's the best way to store leftovers?
Store your cheesecake in an airtight container in the refrigerator for up to 5 days. For longer storage, wrap individual slices in plastic wrap and freeze them for up to 1 month. Thaw frozen slices overnight in the fridge. The crust stays crispy for about 24 hours at room temperature if kept covered.
Can I add chocolate to this recipe?
For a decadent twist, fold ½ cup melted dark chocolate into the peanut butter swirls before baking, or top with chocolate chips right before serving. You can also add 2 tbsp cocoa powder to the filling for a chocolate-peanut butter fusion. The chocolate enhances the peanut flavor beautifully!