
Desserts
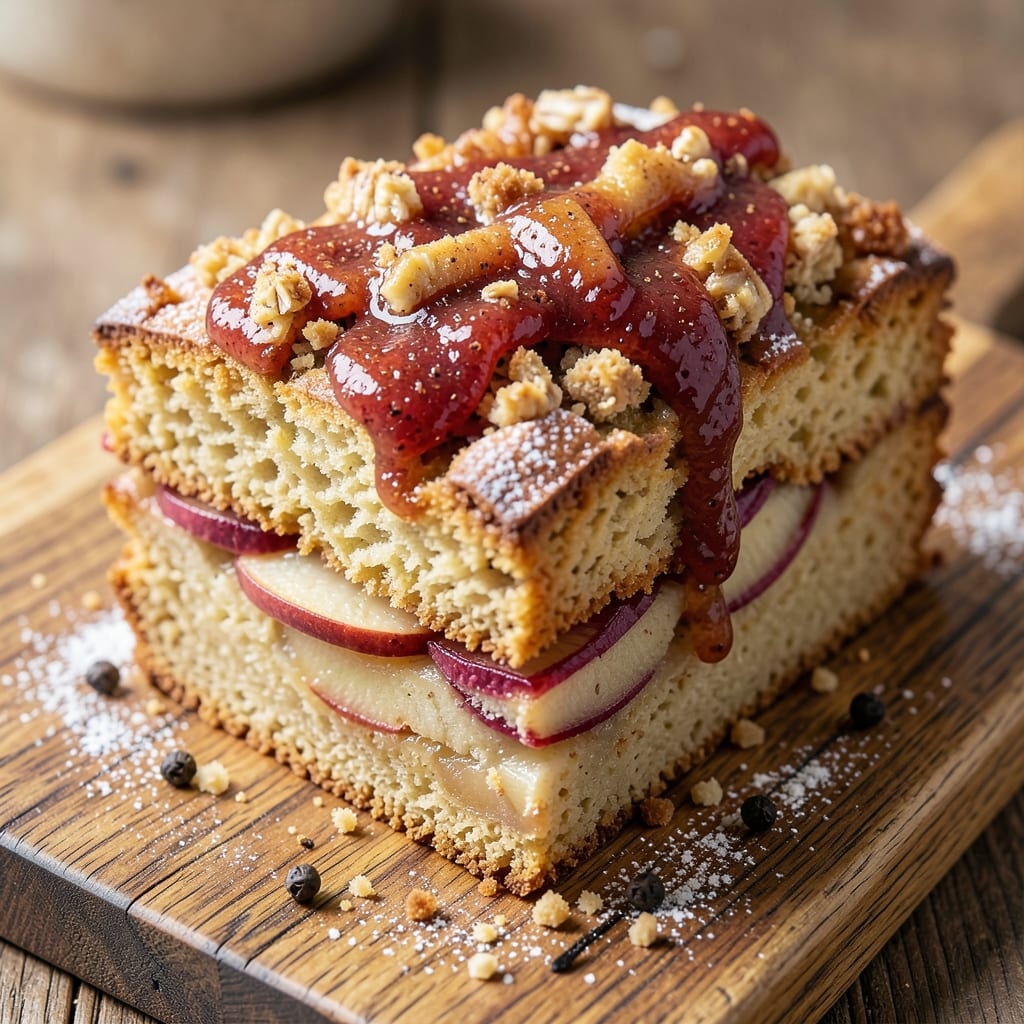
This apple pie pound cake recipe reimagines a classic dessert with the perfect marriage of tender cake layers and spiced apple swirls—no pie crust required. 💛 The secret lies in applesauce and a buttery streusel topping that mimics the cozy flavors of apple pie while delivering the familiar richness of pound cake. I've perfected this recipe to ensure a moist crumb, caramelized apple notes, and a streusel that stays crunchy even after baking.
The beauty of this recipe is its versatility—it works as a showstopping dessert for holidays or a comforting treat for weeknights. The cake itself is foolproof, with a simple mix of flour, butter, and sugar that creates a tender base. What makes it special is the apple filling: a blend of spiced applesauce and diced apples that swirl through the cake layers, giving each bite that familiar apple pie warmth.
By the time it emerges from the oven, you'll have a golden, layered cake with a buttery streusel topping that's crispy on top and soft underneath. The apple filling peeks through in delicious swirls, offering bursts of cinnamon-spiced flavor with every slice. It's the kind of dessert that feels indulgent but doesn't require hours in the kitchen—just one bowl, one pan, and a little patience.
Serve it warm with vanilla ice cream or a dollop of whipped cream for the full experience, or enjoy it at room temperature for a satisfying slice any time of day. Here's how to make it happen—no pie crust, no fuss, just pure comfort in every bite.
Ingredients for apple pie pound cake
Pantry staples and fresh apples transform into a decadent cake with apple pie flavors.
| Ingredient | Amount | Notes |
|---|---|---|
| All-Purpose Flour 🌾 | 3 cups | Sifted for lighter texture |
| Granulated Sugar 🍚 | 2 cups | White or light brown |
| Unsalted Butter 🧈 | 1 ½ cups | Room temperature, full-fat |
| Large Eggs 🥚 | 4 whole | Room temperature for even mixing |
| Applesauce 🍎 | 1 cup | Unsweetened, smooth texture |
| Vanilla Extract 🌿 | 2 tsp | Pure, high-quality extract |
| Ground Cinnamon 🌶️ | 2 tsp | Freshly ground preferred |
| Ground Nutmeg 🌶️ | ½ tsp | Freshly grated for warmth |
| Salt 🧂 | ½ tsp | Diamond Crystal kosher salt |
| Granny Smith Apples 🍏 | 2 medium | Peeled, diced, and cored |
| Old-Fashioned Rolled Oats 🥣 | 1 cup | Blended into flour for streusel |
| Light Brown Sugar 🍚 | ½ cup | Packed for streusel |
| Chopped Walnuts 🥜 | ½ cup | Toasted for extra crunch |
| Powdered Sugar 🍚 | ¼ cup | For dusting top layer |
The apples are the heart of this cake—Granny Smith gives that tangy bite, but Honeycrisp or Fuji work too. Look for firm, unblemished fruit at Whole Foods or Trader Joe's for the best flavor. The applesauce should be unsweetened and smooth—no chunky bits. If you can't find it, blend fresh apples into applesauce yourself. For the butter, Plugrá is my go-to; it's consistent and creamy. Room temperature butter mixes better, so take it out 30 minutes before baking if it's cold.
No Granny Smith apples? Honeycrisp or Braeburn are excellent substitutes—they're sweeter but still hold up well. Short on walnuts? Pecans or almonds work just as well, but toast them first for that nutty flavor. The oats for the streusel? Old-fashioned rolled oats are key—quick oats get mushy. If you're making this ahead, prep the apple filling and streusel separately, then assemble just before baking. The cake layers can be baked up to 1 day in advance—they actually taste better the next day as the flavors meld.
Store the cake layers in an airtight container at room temperature for up to 3 days or in the fridge for 5 days. The streusel topping stays crispy when stored this way. For the full experience, serve with a scoop of vanilla bean ice cream or a dollop of whipped cream. If you're making this for a crowd, double the recipe—the cake keeps well and reheats beautifully. Just warm slices in the oven for 5-10 minutes to restore that fresh-from-the-oven feel.
Why You'll Love This Recipe
- No Mixer Needed: I swear by this recipe when my mixer’s on the fritz—just cream butter and sugar by hand, then fold in the applesauce. The eggs and flour come together like a dream, and honestly? The texture’s so rich you’d never guess it didn’t get whipped to oblivion.
- Spiced Like Fall: That applesauce isn’t just moisture—it’s the secret to a warm cinnamon undertone without tasting like a cookie. The butter and sugar give it that buttery crumb, but the applesauce keeps it from being too heavy. (Yes, even on a Tuesday night.)
- Breakfast or Dessert: Slice it cold for a buttery toast topper with jam, or warm it with a drizzle of honey for a dessert that’s still morning-friendly. I’ve even sent it to school lunches—kids devour it faster than their PB&J.
- Leftovers That Last: This cake doesn’t dry out like others. Wrap a slice in foil, and it stays moist for days—perfect for busy mornings or when you bake once and eat twice. (My coworkers still ask for it weeks later.)
Step-by-step instructions for apple pie pound cake
This layered cake delivers the essence of apple pie in every bite—spiced apple swirls between rich, buttery layers.
👨🍳 Step 1: Prepare the Apple Filling and Streusel
Start by peeling, coring, and dicing the 2 medium Granny Smith apples into ¼-inch pieces. Toss them with 1 tablespoon of the granulated sugar and set aside. In a food processor, blend 1 cup old-fashioned rolled oats, 0.5 cup light brown sugar, 2 tablespoons of the all-purpose flour, 1 teaspoon ground cinnamon, and 0.25 teaspoon ground nutmeg until it resembles coarse crumbs. Fold in the 0.5 cup chopped walnuts—this becomes our streusel topping.
Here's the thing—blending the oats into flour creates a finer streusel that melts beautifully into the cake layers. I like to toast the walnuts first for extra depth, but if you're short on time, skip it—they'll still add great texture. Keep both the apple filling and streusel mixtures at room temperature for even distribution.
🍳 Step 2: Cream Butter and Sugars for Light Layers
In a stand mixer fitted with the paddle attachment, beat the 1.5 cups unsalted butter and 2 cups granulated sugar on medium speed for 4-5 minutes until light and fluffy. You're looking for a color change from pale yellow to a slightly off-white, with ribbons forming when the beaters are lifted. This step is critical—it incorporates air that will make your cake tender and moist.
I press down on the butter mixture with a spatula during the last minute to ensure it's fully emulsified. This prevents dense layers and gives that classic pound cake texture. Don't rush this—under-creaming leads to a cake that's more like a dense brownie than a light, airy pound cake.
👨🍳 Step 3: Combine Wet and Dry Ingredients
Add the 4 whole large eggs, one at a time, mixing well after each addition. Then stir in the 1 cup applesauce, 2 teaspoons vanilla extract, 2 teaspoons ground cinnamon, 0.5 teaspoon ground nutmeg, and 0.5 teaspoon salt. With the mixer on low speed, gradually add the 3 cups all-purpose flour, mixing just until combined—you should still see some flour streaks. Overmixing develops gluten, which makes the cake tough.
Here's where it gets fun—fold the diced apples into the batter using a silicone spatula. You'll notice the batter becomes slightly thicker and more vibrant. The applesauce keeps the cake moist while adding natural sweetness, and the apples themselves create those signature apple pie pockets throughout each slice.
🥘 Step 4: Assemble and Bake the Layers
Preheat your oven to 350°F and grease three 8-inch round cake pans. Divide the batter evenly among the pans, then sprinkle 1-2 tablespoons of the streusel mixture over each layer. Using a spoon, gently swirl the apples into the batter in each pan—this creates those beautiful apple pockets when baked. Top each layer with the remaining streusel.
Bake for 25-30 minutes, until a toothpick inserted into the center comes out clean. I like to rotate the pans halfway through baking for even browning. The cake should be golden on top with a slightly domed center—this indicates it's perfectly baked. Let the cakes cool in the pans for 10 minutes before transferring to a wire rack.
⏰ Step 5: Dust and Serve
Once completely cooled, dust the top of each layer with 0.25 cup powdered sugar using a fine-mesh sieve. This adds that classic pound cake finish and balances the spiced flavors. For serving, slice each layer horizontally to reveal those beautiful apple swirls throughout the cake.
This cake keeps well for 3 days at room temperature or can be frozen for up to 3 months. The combination of spiced apples, buttery layers, and crunchy streusel makes every bite taste like a slice of homemade apple pie—without the fuss of a pie crust. Serve with vanilla ice cream or whipped cream for the ultimate dessert experience.
Pro Tips For Making Apple Pie Pound Cake
- Cream Butter Slowly: Beat the butter and sugar until it’s light and airy—about 3-5 minutes—before adding anything else. I used to rush this, and the cake turned dense. Let the butter soften first if it’s cold, and resist the urge to skip this step even if your mixer’s whining.
- Whisk Eggs First: Separate the yolks and whites, then whip the whites to stiff peaks before folding them into the batter. This adds lift, and the applesauce can make the batter too heavy otherwise. (Yes, it’s extra work, but the texture’s worth it.)
- Don’t Overmix the Dry: Fold the flour into the wet ingredients just until combined—lumps are fine. Overmixing develops gluten and makes the cake tough. I learned this after a cake that looked like a brick. Stop when the flour’s mostly gone, not when it’s smooth.
- Use Warm Applesauce: Heat the applesauce to room temperature (or even slightly warm) before mixing it in. Cold applesauce can make the batter separate or sink in the middle. Stir it into the wet ingredients last—this keeps the cake moist without weighing it down.
Pro cooking tips for this dish
Layering Like a Pro
For even distribution, divide the batter perfectly among your three 8-inch cake pans—I use a kitchen scale to weigh each portion at 400 grams for consistency. This ensures uniform baking and prevents one layer from drying out faster. After adding the streusel topping, use a long-handled spoon to gently swirl the apples into the batter in circular motions. This creates those signature apple pockets without overmixing. 🍎
Streusel Perfection
Your streusel should be coarse but not chunky—think of it like wet sand. If it clumps, pulse it in the food processor an extra 5 seconds. For maximum crunch, toast the walnuts in a dry skillet over medium heat for 3-4 minutes until fragrant, then cool before folding in. This adds depth that store-bought streusel can't match. Pro tip: Sprinkle a little extra streusel on top before baking for that bakery-style finish.
Baking Time Mastery
Every oven behaves differently, so start checking for doneness at 25 minutes. Look for a golden dome in the center—this means the cake is fully set but still moist. If the top browns too quickly, tent loosely with aluminum foil after 20 minutes. I like to rotate the pans halfway through baking for even color. The toothpick test is foolproof: insert it in the center—if it comes out with moist crumbs (not wet batter), it's ready.
Cooling Strategy
Let the cakes cool in their pans for 10 minutes—this prevents them from cracking when transferred. Then, run a thin knife around the edges to loosen before placing on a wire rack. For extra insurance against cracking, I chill the pans in the freezer for 5 minutes before baking. This is especially helpful in humid kitchens where cakes tend to rise unevenly. The result? Clean layers every time. ⏰
Apple Prep Secrets
Granny Smith apples are my top choice, but if you prefer sweeter apples, Honeycrisp or Braeburn work beautifully. For even cooking, cut the apples into ¼-inch pieces—any larger, and they won't soften evenly. Toss them with 1 tablespoon sugar to prevent browning while prepping. If your apples are particularly juicy, drain them in a fine-mesh strainer for 5 minutes before folding into the batter. This keeps your cake from becoming soggy.
Make-Ahead Magic
Assemble the cake layers up to 24 hours ahead and store them in an airtight container at room temperature. The flavors actually deepen overnight! To reheat, wrap individual slices in foil and warm in a 350°F oven for 8-10 minutes. This restores that fresh-from-the-oven texture while keeping the streusel crisp. For freezing, wrap each layer tightly in plastic wrap, then place in a ziplock bag for up to 3 months. Thaw overnight in the fridge before serving.
Nutrition facts
Frequently asked questions
Can I make this cake without applesauce?
Yes, but the texture will be drier. Replace the 1 cup applesauce with 1 cup unsweetened Greek yogurt or ½ cup melted butter + ½ cup milk for moisture. For flavor, add 1 teaspoon extra vanilla extract and ½ teaspoon apple pie spice to compensate. The applesauce keeps this cake tender and adds natural sweetness—don't skip it if possible!
Why does my cake have cracks on top?
Cracks usually happen from sudden temperature changes or overbaking. To prevent them, chill your pans in the freezer for 5 minutes before baking, and check for doneness at 25 minutes. If your kitchen is humid, reduce oven temp to 325°F and bake for 35-40 minutes. The cake should spring back when gently pressed, not feel rubbery.
Can I use this recipe for a single-layer cake?
For a single 9-inch layer, reduce the batter to 2 cups and bake in one pan for 35-40 minutes. Double the streusel and applesauce amounts to maintain flavor balance. Use the same baking time but check for doneness at 30 minutes. The single layer will be denser but still delicious—perfect for a quick dessert!
How do I store leftovers to keep the streusel crisp?
Store the cake layers in an airtight container at room temperature for up to 3 days. For longer storage, wrap each layer in plastic wrap and freeze for up to 3 months. To reheat, warm slices in a 350°F oven for 8-10 minutes—this restores the streusel's crunch without drying out the cake.
What's the best way to serve this cake?
Warm slices with a scoop of vanilla bean ice cream or a dollop of whipped cream for the full experience. For a fancy touch, drizzle with caramel sauce or dust with extra cinnamon. Serve at room temperature for a lighter texture, or slightly warmed for that fresh-from-the-oven appeal. It's also perfect for breakfast with a cup of coffee!