
Desserts
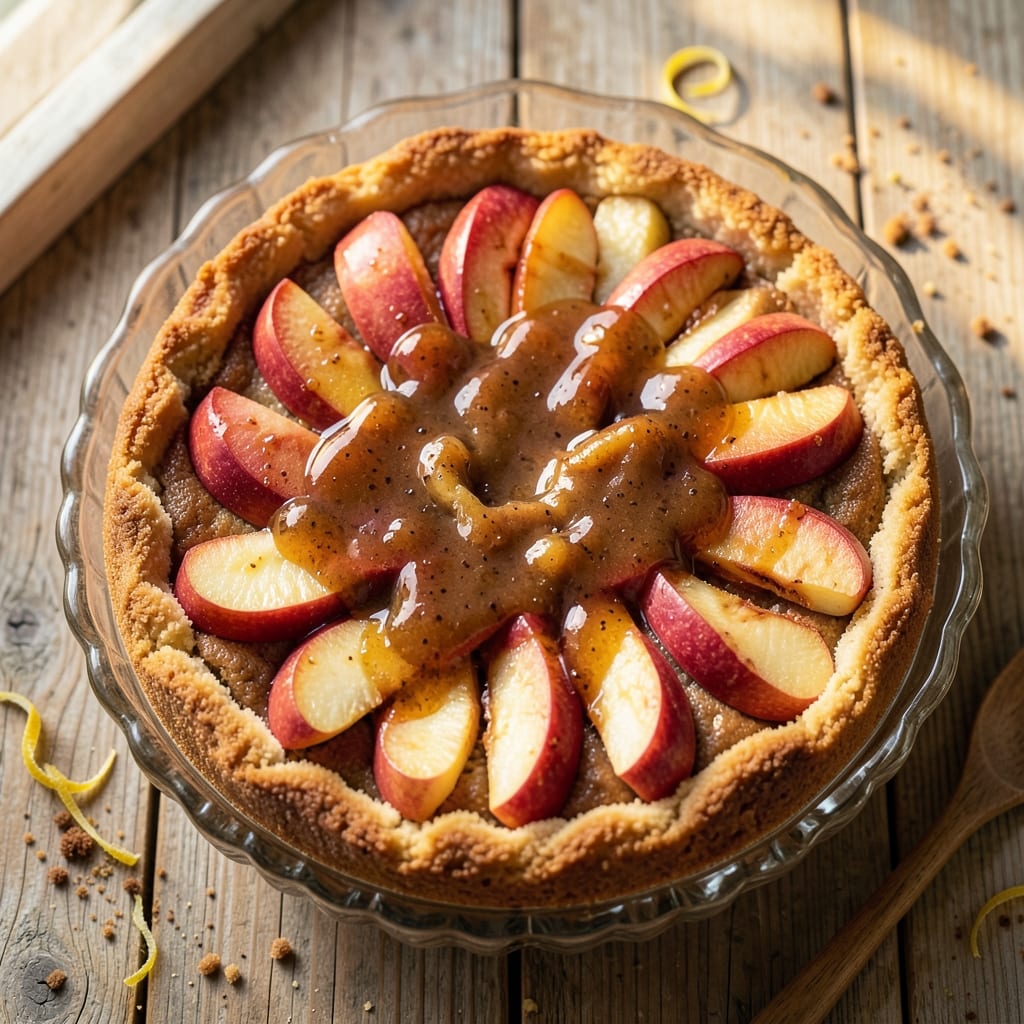
This apple pie cake recipe tutorial delivers the perfect fusion of cake and pie—moist vanilla cake layers sandwiched with spiced sautéed apples and crowned with a buttery lattice crust. The secret lies in balancing tender cake with caramelized apple filling, creating a dessert that satisfies both cake lovers and pie enthusiasts. I've perfected this recipe over years of baking, ensuring every slice delivers that nostalgic apple pie flavor with cake's comforting texture.
The beauty of this layered dessert is its versatility—classic vanilla cake provides the ideal base, while the apple filling transforms it into something extraordinary. You'll start with a simple yet foolproof cake recipe, then build layers with a warm spiced apple mixture that's been gently cooked to intensify its natural sweetness. The lattice topping adds a rustic charm while keeping the filling warm and gooey when sliced.
What makes this recipe truly special is the harmony of textures: tender cake, caramelized apples, and flaky crust all working together in perfect balance. Each bite offers a mix of sweet, spiced apple and rich vanilla cake, topped with a hint of buttery crust. This dessert is elegant enough for special occasions but simple enough for a cozy weeknight treat.
Serve warm with a scoop of vanilla ice cream or a drizzle of caramel sauce for the ultimate indulgence. Whether you're baking for a celebration or just craving a taste of autumn, this apple pie cake brings comfort and joy to every slice. Let's get started on creating this layered masterpiece!
Ingredients for apple pie cake recipe tutorial
Moist cake layers, caramelized apple filling, and buttery lattice crust—this dessert merges pie and cake magic.
| Ingredient | Amount | Notes |
|---|---|---|
| All-Purpose Flour 🌾 | 2 ½ cups | Sifted for light texture |
| Granulated Sugar 🍚 | 2 cups | Divided for cake and filling |
| Brown Sugar 🍚 | ½ cup | Packed for apple filling |
| Unsalted Butter 🧈 | 1 cup | Room temperature, cubed |
| Large Eggs 🥚 | 4 whole | Room temperature for best mixing |
| Vanilla Extract 💧 | 2 tsp | Pure extract preferred |
| Baking Powder 🧂 | 2 tsp | Aluminum-free preferred |
| Ground Cinnamon 🌿 | 1 ½ tsp | Divided for cake and filling |
| Salt 🧂 | ½ tsp | Fine sea salt preferred |
| Honeycrisp Apples 🍎 | 4 medium | Peeled, cored, sliced thin |
| Lemon Juice 🍋 | 1 tbsp | Freshly squeezed |
| Unsalted Butter 🧈 | ½ cup | Melted for lattice crust |
| All-Purpose Flour 🌾 | 2 cups | For lattice crust |
| Vanilla Ice Cream 🍦 | 2 cups | Optional for serving |
The apples are the heart of this dessert. Honeycrisp or Granny Smith work best—their balance of sweet and tart holds up beautifully during baking. Trader Joe's or Whole Foods usually have the freshest selection, but any crisp apple will do if you peel and slice them thin. For the best texture, toss the sliced apples with a bit of sugar and lemon juice right after peeling to prevent browning. If you're short on time, pre-sliced apples from the salad bar work in a pinch, but rinse them well first.
No vanilla extract? Vanilla bean paste or even a scraped vanilla bean work just as well. Short on brown sugar? Substitute white sugar plus 1/2 tsp molasses for that caramel depth. The lattice crust can be made with store-bought pie crust if you're pressed for time—just brush it with melted butter before baking. For the cake batter, buttermilk substitutes like milk plus a splash of vinegar or lemon juice keep it light. And if you're making this gluten-free? Swap the all-purpose flour for a 1:1 gluten-free blend—just add an extra 1/2 tsp xanthan gum if your blend doesn't include it.
The cake layers keep well at room temperature for 2 days if stored in an airtight container, but they're best enjoyed fresh. The assembled pie cake reheats beautifully—just warm it at 300°F for 10 minutes to revive the lattice crust. For make-ahead convenience, assemble the cake and filling up to 24 hours ahead, then bake just before serving. The lattice crust can be made a day ahead and stored wrapped in plastic—bring it to room temperature before using. And if you have leftovers? Toasted apple slices make an amazing breakfast the next morning.
Why You'll Love This Recipe
- No Mixer Needed: I swear by this—just a bowl and a fork. The butter and sugars get creamed so well by hand, and the flour comes together without a single crumb. Honestly, my lazy Sundays just got a whole lot easier.
- Spiced Like Fall: That brown sugar? It’s the star—caramelizing just enough to wrap every bite in warm, buttery sweetness. Add a pinch of cinnamon, and suddenly you’ve got apple pie and cake in one slice. (Yes, even on a Tuesday night.)
- Leftovers That Win: Slice it, wrap it, and stash it. This cake keeps perfectly for days, and the flavor only gets better as the spices meld. I’ve brought it to potlucks, packed it for lunch, and still had half a pan by Thursday. No guilt, all joy.
- Budget-Friendly Luxury: Flour, sugar, butter—these are pantry staples that actually feel special. No fancy ingredients, no last-minute grocery runs. Between us, this is how I make dessert feel like a treat without breaking the bank.
Step-by-step instructions for apple pie cake magic
Here's how to create the perfect fusion of cake and pie—moist layers, spiced apples, and a buttery lattice top.
Prepare the Apple Filling
Peel, core, and slice the 4 medium Honeycrisp Apples into ¼-inch thick slices. Toss them in a bowl with 1 tbsp Lemon Juice and ½ tsp Salt—this brightens the flavor and prevents browning. In a separate small saucepan, melt ½ cup Unsalted Butter over low heat, then stir in ½ cup Brown Sugar and 1 tsp Ground Cinnamon. Pour this warm mixture over the apples and toss gently to coat. Let the filling sit for 10 minutes while you prepare the cake batter—this lets the apples soften slightly and absorb the sweet-spiced butter.
Real talk: Don't skip the lemon juice. It keeps the apples from turning mushy and adds a nice tang that balances the sweetness. If your apples are particularly juicy, you might want to drain them briefly after tossing with the lemon juice to prevent a soggy cake.
Bake the Cake Layers
Preheat your oven to 350°F and grease two 8-inch round cake pans. In a large mixing bowl, cream together 1 cup Unsalted Butter and 2 cups Granulated Sugar until light and fluffy—this should take about 3-4 minutes with a stand mixer. Add the 4 whole Large Eggs, one at a time, mixing well after each addition. Stir in 2 tsp Vanilla Extract, then sift in 2.5 cups All-Purpose Flour, 2 tsp Baking Powder, ½ tsp Salt, and the remaining ½ tsp Ground Cinnamon. Mix just until combined—overmixing develops gluten, which makes the cake dense.
Divide the batter evenly between the prepared pans. Bake for 25-30 minutes, or until a toothpick inserted into the center comes out clean. Let the layers cool in the pans for 10 minutes, then transfer to a wire rack to cool completely. This step is crucial—warm layers will get soggy when you add the filling later.
Assemble the Cake Layers
Once the cake layers are completely cool, place one layer on a serving plate. Spread ⅓ of the apple filling evenly over the top, leaving a ½-inch border uncovered. This border prevents the filling from oozing out when you add the next layer. Place the second cake layer on top and spread another ⅓ of the filling over it. Top with the final ⅓ of the filling, pressing down gently to create a smooth surface.
Here's the thing—don't rush this assembly. The filling should be spread evenly, but not packed down so tightly that it squeezes out when you cut the cake. A gentle hand ensures clean slices and a perfect balance of cake and filling in every bite.
Create the Lattice Topping
Roll out 2 cups All-Purpose Flour on a lightly floured surface into a 12x16-inch rectangle. Using a sharp knife or pizza cutter, make ½-inch wide strips running horizontally across the rectangle. Then, cut vertical strips, but leave every other strip attached at the top and bottom to create a lattice pattern. Brush the top of the cake with melted butter—this adds flavor and helps the lattice crisp up beautifully.
Carefully drape the lattice over the cake, pressing down gently to secure it. Brush the lattice with more melted butter and sprinkle with the remaining ½ tsp Ground Cinnamon. Bake at 350°F for 15-20 minutes, until the lattice is golden brown and the filling is bubbling at the edges. The aroma at this point is pure magic—warm cinnamon, buttery apples, and vanilla notes filling your kitchen.
Serve with Ice Cream
Let the cake cool for at least 1 hour before serving—this allows the filling to set slightly and makes for cleaner slices. Serve warm slices with 2 cups Vanilla Ice Cream on the side. The contrast of the warm, spiced cake with the cold, creamy ice cream is what makes this dessert truly special.
Pro tip: If you're serving this at a gathering, prepare the cake ahead of time and reheat individual slices in the oven at 325°F for 5-7 minutes before serving. This keeps the cake layers moist and the filling warm, ensuring every bite is as delicious as the first.
Pro Tips For Making Apple Pie Cake Recipe Tutorial
- Mix Butter Cold: Take that butter straight from the fridge—no softening needed. I used to melt it for convenience, but cold butter creates flakier layers in the cake’s crust, especially when paired with the apples. Cut it into small cubes and mix it into the flour with a fork until it resembles coarse crumbs.
- Whisk Eggs First: Beat the eggs until they’re pale and slightly thickened before adding them to the dry ingredients. This ensures even distribution and prevents dry spots in the cake. I learned this the hard way—lumpy eggs lead to uneven texture, and no one wants a dense apple pie cake.
- Skip Overmixing: Once the wet ingredients are incorporated, stop mixing the second the flour disappears. Overworking the batter introduces too much gluten, making the cake tough instead of tender. Fold just until combined—your future self will thank you when slicing.
- Preheat Pan Properly: Place your cake pan in a 350°F (175°C) oven for 5–10 minutes before baking. This jumpstarts the crust formation and prevents the batter from sinking in the middle. (Yes, even if you’re impatient like me—trust the process.) The apples stay juicy, and the edges get that perfect golden-brown color.
Serving suggestions for this dish
Classic Ice Cream
Vanilla ice cream is the perfect classic pairing for this apple pie cake. The cool, creamy texture contrasts beautifully with the warm, spiced cake and filling. I recommend using a high-quality brand like Breyers or Ben & Jerry's for that rich, smooth consistency. Scoop about 2 tablespoons per slice and let guests serve themselves for that nostalgic ice cream sundae experience. 🍦
For a more elegant presentation, try layering the ice cream directly on top of each slice. This creates a mini dessert tower that's perfect for special occasions. If you want to get fancy, drizzle a little caramel sauce over the ice cream for that extra touch of indulgence.
Caramel Drizzle
A warm caramel drizzle takes this dessert to the next level. Use a high-quality store-bought caramel sauce like Smucker's or make your own by simmering 1 cup granulated sugar and ¼ cup heavy cream until it turns a golden amber color. Let it cool slightly before drizzling over slices. The caramel adds a rich, buttery sweetness that complements the spiced apples perfectly. 🍯
For an extra-special touch, try a salted caramel drizzle. Sprinkle a pinch of flaky sea salt (like Maldon) on top right before serving. This enhances the caramel flavor and adds a sophisticated contrast to the sweetness of the cake and apples.
Whipped Cream
Lightly sweetened whipped cream is a classic dessert companion. Whip 1 cup heavy cream with 1 tablespoon powdered sugar and a pinch of vanilla extract until soft peaks form. Pipe or dollop it onto each slice for a clean, elegant presentation. The airy texture balances the dense cake and filling beautifully. 🥛
For added flavor, infuse the whipped cream with spices like a pinch of cinnamon or nutmeg. This ties in perfectly with the apple pie flavors and adds a warm, comforting note to each bite. Store-bought whipped cream works in a pinch, but homemade always tastes better.
Spiced Whiskey Sauce
For a more sophisticated pairing, try a spiced whiskey sauce. Simmer ½ cup apple cider, ¼ cup bourbon (like Maker's Mark), 2 tablespoons brown sugar, and 1 cinnamon stick for 10 minutes. Strain and drizzle over warm slices. The warm spices and subtle alcohol flavor add depth and complexity to the dessert. 🥃
This sauce works especially well if you're serving the cake warm. The heat from the cake helps the whiskey aroma release beautifully. If you prefer a non-alcoholic version, substitute the bourbon with extra apple cider and a splash of vanilla extract.
Fresh Fruit Garnish
Brighten up your presentation with fresh fruit garnishes. Thinly sliced pear or apple slices add a fresh, crisp contrast to the warm cake. A few raspberries or blackberries** scattered on top add a pop of color and a tart balance to the sweetness. 🍎
For a more elegant touch, arrange the fruit in a circular pattern around the plate. This not only looks beautiful but also makes the dessert feel more special. If you're serving this at a gathering, prepare the fruit garnishes just before serving to keep them fresh and vibrant.
Nutrition facts
Frequently asked questions
Can I make this apple pie cake without a lattice crust?
If you prefer a simpler approach, cover the cake with a whole pie crust instead. Press it gently over the filling and trim any excess. Brush with melted butter and sprinkle with cinnamon before baking. The crust will still add that classic pie flavor without the intricate lattice work. For an even easier option, use store-bought pie crust—just make sure it's fully chilled before handling.
How do I prevent the cake layers from getting soggy?
This is all about timing and technique. Always let the cake layers cool completely before assembling. If you're in a hurry, chill them in the fridge for 30 minutes to help them set faster. Also, make sure your apple filling isn't too wet—drain any excess liquid after tossing with the spiced butter mixture. A ½-inch border of uncovered cake around the edges helps prevent filling from seeping through.
Can I substitute other fruits for the apples?
Yes, but you'll need to adjust the cooking time and sweetness. Pears work beautifully with similar spicing, while peaches or plums add a different flavor profile. For tart fruits like rhubarb, reduce the sugar in the filling slightly. If using softer fruits, you might want to reduce the baking time by 5 minutes to prevent overcooking. The key is to maintain that balance between tender cake and cooked fruit.
How far ahead can I prepare this dessert?
You can assemble the cake and filling up to 24 hours ahead and refrigerate it. When ready to serve, bake just before eating to warm everything up. For the lattice topping, make it a day ahead and store wrapped in plastic—bring to room temperature before using. The cake layers keep well at room temperature for 2 days in an airtight container, but they're best enjoyed fresh for maximum moisture.
What's the best way to store leftovers?
Store leftovers in an airtight container at room temperature for up to 2 days. For longer storage, refrigerate for up to 4 days. To reheat, wrap individual slices in foil and warm at 325°F for 5-7 minutes until the lattice is crisp again. The filling will soften slightly but still taste delicious. For an extra treat, toast the leftovers in the oven with a sprinkle of cinnamon sugar.