
Desserts
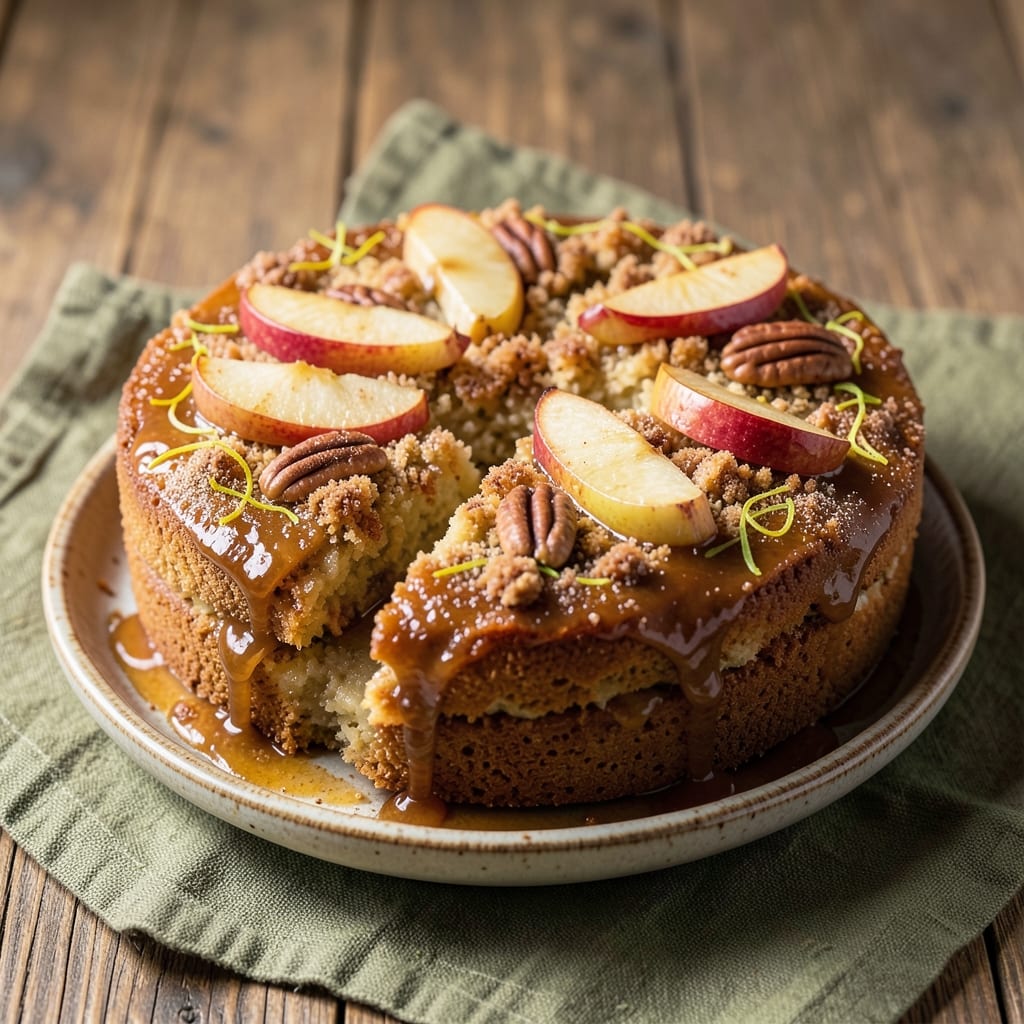
This apple fall harvest cake recipe captures the essence of autumn in every slice—warm cinnamon, nutmeg, and caramelized apples layered between moist, spiced cake. I developed it after years of perfecting the balance between tender crumb and rich, spiced apple filling, ensuring every bite feels like a cozy hug. The secret lies in baking the apples until they're tender but still hold their shape, then layering them with a buttery, fragrant cake batter that bakes into a golden, aromatic masterpiece.
The recipe begins with a simple yet foolproof cake batter—just flour, sugar, butter, eggs, and a blend of warm spices that define fall. While that bakes, you'll caramelize the apples with brown sugar and spices until they're tender and fragrant, then layer them between the cake's tender layers. This isn't just dessert; it's a celebration of seasonal flavors, where every ingredient plays a part in creating something truly special.
What you'll end up with is a cake that's as beautiful as it is delicious—golden layers of spiced cake filled with caramelized apples, all topped with a light glaze that adds just the right amount of shine. The aroma alone will fill your kitchen with the scent of autumn, while the texture delivers a perfect balance of moist cake and tender, spiced apples. It's the kind of dessert that feels like a warm embrace, perfect for gatherings or a quiet evening by the fire.
Serve it with a dollop of whipped cream or a scoop of vanilla ice cream to enhance the flavors, and watch as everyone reaches for seconds. This cake keeps well for days, making it ideal for holiday prep or sharing with neighbors. Here's how to bring the flavors of fall into your kitchen—one delicious slice at a time.
Ingredients for apple fall harvest cake
These cozy fall flavors come together for a cake that tastes like autumn in every bite.
| Ingredient | Amount | Notes |
|---|---|---|
| All-Purpose Flour 🌾 | 3 cups | Sifted for light texture |
| Granulated Sugar 🍚 | 2 cups | White or light brown |
| Light Brown Sugar 🍚 | ½ cup | Packed for caramelization |
| Unsalted Butter 🧈 | 1 cup | Softened to room temperature |
| Large Eggs 🥚 | 2 whole | Room temperature for best mixing |
| Ground Cinnamon 🌶️ | 2 tbsp | Freshly ground preferred |
| Ground Nutmeg 🌿 | 1 tsp | Freshly grated for warmth |
| Ground Ginger 🌶️ | 1 tsp | Freshly ground for zing |
| Salt 🧂 | ½ tsp | Kosher or sea salt |
| Vanilla Extract 🌸 | 1 tbsp | Pure vanilla preferred |
| Apples 🍎 | 4 medium | Honeycrisp or Fuji, peeled |
| Lemon Juice 🍋 | 1 tbsp | Freshly squeezed |
| Powdered Sugar 🍚 | ½ cup | For glaze, sifted |
| Heavy Cream 🥛 | ¼ cup | For glaze, chilled |
The apples are the heart of this cake—Honeycrisp or Fuji are my go-tos because they hold their shape while caramelizing beautifully. Grab a few extra for snacks while you prep. Trader Joe's usually has Honeycrisp in season, but any crisp apple works. Peeled and sliced into 1/4-inch pieces, they'll caramelize perfectly with the brown sugar and spices. If you can't find Honeycrisp, Gala or Pink Lady are great backups—they just soften a bit faster, so keep an eye on them.
No vanilla extract? Vanilla bean paste works too, or even a pinch of vanilla sugar. Running short on powdered sugar for the glaze? Granulated sugar crushed in a blender does the trick. The spices are non-negotiable—freshly ground cinnamon and nutmeg make all the difference. If you're feeling fancy, toast your spices in a dry pan for 30 seconds to deepen the flavor. The butter should be soft but not melted—microwave 20 seconds if needed. For the apples, toss them with lemon juice right away to prevent browning while you prep the rest.
This cake keeps beautifully for 5 days wrapped in plastic at room temperature, or 2 weeks in the fridge. For longer storage, freeze it 3 months—just thaw overnight before serving. The glaze sets quickly, so assemble the cake just before serving. I always make a double batch—one for the table and one to freeze for lazy weeknights. The aroma alone will have your kitchen smelling like a fall festival.
Why You'll Love This Recipe
- No Mixer Needed: I swear, this cake comes together with a spoon and a bowl—no stand mixer, no food processor, just a little elbow grease. The butter and sugars get creamed by hand in minutes, and the flour mixture folds in smoother than you’d think.
- Spiced Warmth in Every Bite: That combo of brown sugar and cinnamon? It’s like fall in a box. The apples add just enough tartness to cut through the richness, and the butter keeps it moist without being heavy.
- Weeknight Dinner Hack: Slice it thin, toast it up, and serve with ice cream or yogurt for dessert—or stack it with peanut butter for breakfast. Honestly, I’ve eaten this cold the next day, and it’s still just as good.
- Budget-Friendly Crowd-Pleaser: Uses pantry staples (hello, flour and sugar) and stretches further than you’d expect. Between us, I’ve fed eight people with one batch, and the leftovers disappear faster than I can say “seconds, please.”
Step-by-step instructions for apple fall harvest cake
Layer by layer, we'll transform sweet apples and warm spices into a moist, caramelized cake that tastes like autumn.
Prepare the Apples for Maximum Flavor
Peel and core the 4 medium apples, then slice them into ¼-inch thick rounds. Toss the slices immediately with 1 tablespoon lemon juice to prevent browning—this keeps them vibrant and bright. I like to use Honeycrisp or Fuji apples because they hold their shape beautifully during baking while still becoming tender.
Transfer the apple slices to a bowl and sprinkle with 1 tablespoon granulated sugar from our ingredients. This helps draw out their natural juices, creating a caramelized apple filling that'll soak into the cake layers. Let them sit for 15 minutes while you prepare the batter—this pre-sweetening step makes all the difference in flavor development.
Mix the Cake Batter for Perfect Texture
Preheat your oven to 350°F and grease two 9-inch round cake pans with butter, then line the bottoms with parchment paper. In a large mixing bowl, combine the 3 cups all-purpose flour, 2 tablespoons ground cinnamon, 1 teaspoon ground nutmeg, 1 teaspoon ground ginger, and ½ teaspoon salt. Sift this mixture together to eliminate any lumps—this ensures your cake will be light and tender rather than dense.
In a separate large bowl, cream together the 1 cup softened unsalted butter, 2 cups granulated sugar, and ½ cup packed light brown sugar on medium speed until light and fluffy, about 3-4 minutes. This step incorporates air, which creates that perfect rise in our cake layers. Add the 2 whole large eggs, one at a time, mixing well after each addition, then stir in the 1 tablespoon vanilla extract. The batter should be smooth and slightly thick.
Combine Wet and Dry Ingredients
Gradually add the dry ingredients to the wet mixture, mixing on low speed just until combined. Be careful not to overmix—you should still see some flour streaks. This careful mixing prevents developing too much gluten, which would make our cake tough instead of tender. Fold in half of the prepared apple slices, reserving the rest for later.
Divide the batter evenly between the two prepared cake pans. Sprinkle half of the remaining apple slices over the top of each layer, then gently press them down just enough to hold their position. This creates alternating layers of cake and apple that'll create pockets of caramelized flavor throughout.
Bake to Golden Perfection
Bake the cakes for 25-30 minutes, or until a toothpick inserted into the center comes out clean. The edges should be golden brown while the tops may still look slightly underdone—this is normal and will finish cooking as they cool. Rotate the pans halfway through baking to ensure even browning.
While the cakes are baking, prepare the cream cheese glaze by whisking together the ½ cup powdered sugar and ¼ cup chilled heavy cream until smooth. This glaze adds a sweet contrast to the spiced cake layers and helps bind everything together beautifully. Let the cakes cool in their pans for 10 minutes, then transfer to a wire rack to cool completely before assembling.
Assemble and Glaze for Ultimate Fall Flavor
Once completely cool, place one cake layer on a serving plate and spread a thin layer of the cream cheese glaze over the top. This glaze acts as our "cement" that holds the layers together while adding that perfect sweet finish. Top with the second cake layer and spread the remaining glaze over the top and sides of the cake.
Garnish with the remaining apple slices arranged decoratively on top. For extra presentation, you can dust with additional powdered sugar or sprinkle with extra cinnamon. Let the glaze set for 10 minutes before serving—this gives it time to firm up slightly while still remaining spreadable. Each slice will reveal those beautiful caramelized apple pockets throughout the moist cake layers.
Pro Tips For Making Apple Fall Harvest Cake
- Cream Butter Slowly: Dump cold butter into the flour mix and pulse your mixer—you’ll end up with a lumpy mess. Instead, cut the butter into small cubes, then let it sit at room temp for 30 minutes before creaming. Warm butter mixes faster, but don’t let it get soft enough to smear; you want it firm enough to hold structure. (Yes, even if you’re impatient like me.)
- Sift That Flour: I used to just scoop flour from the bag straight into the bowl, and the cake always turned out dense. Sift the all-purpose flour first—especially if it’s old or clumpy—to aerate it. This lightens the texture and prevents pockets of dry flour from forming. A quick shake in a fine-mesh sieve takes 10 seconds and makes a real difference.
- Don’t Overmix the Apples: Tossing diced apples with sugar and cinnamon is key, but resist the urge to mash them into a pulp. Leave them slightly firm—just enough to release juice—so they add texture, not a soggy center. If your apples are extra juicy, drain them briefly in a colander before folding them in. (Your future self will thank you.)
- Test for Doneness Early: This cake’s got a thick middle, so skip the toothpick test—it’ll come out clean too soon. Instead, press gently in the center with a finger. If it springs back slowly but leaves a slight indent, it’s done. Overbaking turns the cake dry, and underbaking leaves it gummy. Pull it when it’s just set, then tent with foil if you’re worried.
Regional styles of these flavors
New England Apple Cake
In the Northeast, this cake often features dried cranberries mixed into the batter for a tart contrast to the sweet apples. I like adding 1 cup dried cranberries to the cake batter along with the apples, then topping with a cream cheese frosting instead of glaze. The cranberries add a festive pop of color and a tangy balance that feels very autumnal in New England. Serve with a scoop of vanilla bean ice cream for a true regional treat. 🍎
Southern Caramel Apple Layers
Southern bakers often take this cake in a richer direction, using pecan streusel between layers instead of plain apples. Mix 1 cup chopped pecans, ½ cup brown sugar, ½ cup flour, and ¼ cup melted butter for the streusel, then sprinkle it between cake layers. The pecans add a buttery crunch that pairs perfectly with the caramelized apples. Top with a bourbon-infused glaze by adding 1 teaspoon bourbon to the powdered sugar mixture for an adult-friendly twist. 🥜
Midwest Spiced Apple Crunch
The Midwest version keeps the classic apple-cake combo but adds a gingersnap crumble on top for texture. After assembling the cake layers, mix 1 cup crushed gingersnaps with 2 tablespoons melted butter and sprinkle it over the glaze before serving. This adds a molasses-like depth that’s signature to Midwest baking. Pair it with apple cider for dipping—it’s a match made in fall heaven. 🍂
Pacific Northwest Tart Cherry Twist
Out West, bakers often substitute tart cherries for apples to reflect local orchard flavors. Use 1 cup pitted tart cherries (fresh or frozen) instead of apples, and reduce the sugar in the batter by ¼ cup since cherries are naturally sweeter. The cherries caramelize beautifully and add a bright acidity that cuts through the richness. Top with a lemon glaze (replace heavy cream with lemon juice) for a zesty finish. 🍒
German Apple Streuselkuchen
For a true European twist, this version uses a double streusel—one between layers and one on top. Mix 2 cups flour, 1 cup brown sugar, ½ cup cold butter, and 1 teaspoon cinnamon for the streusel, then sprinkle half between cake layers and half on top before baking. The result is a cake with crispy, buttery pockets throughout. Serve with whipped cream and a sprinkle of powdered sugar for a café-style dessert. 🇩🇪
Nutrition facts
Frequently asked questions
Can I use any type of apple for this cake?
For the best texture and flavor, stick with crisp apple varieties like Honeycrisp or Fuji. These hold their shape beautifully while caramelizing. Gala or Pink Lady work too but may soften slightly faster. Avoid mealy apples like Red Delicious—they won't hold up well in the baking process.
How do I prevent the cake from being too dry?
Keep your ingredients at room temperature (especially butter and eggs) and don't overmix the batter. Also, brush the cake layers with simple syrup or apple juice after baking to add moisture. For extra insurance, consider adding ¼ cup sour cream or yogurt to the batter for a tender crumb.
Can I make this cake ahead of time?
Bake the layers up to 2 days ahead and store them wrapped at room temperature. Assemble the cake 24 hours before serving to let the glaze set properly. For longer storage, freeze the baked layers (unfrosted) for up to 3 months. Thaw overnight in the fridge before assembling.
What's the best way to store leftovers?
Keep leftovers covered at room temperature for 3 days or refrigerate for up to 5 days. For longer storage, freeze individual slices wrapped in plastic for 1 month. Reheat slices in the microwave for 10-15 seconds to restore freshness. The cake actually improves with age as the flavors meld!
How can I make this cake gluten-free?
Replace the all-purpose flour with a 1:1 gluten-free baking flour blend (like Bob's Red Mill) and add ½ teaspoon xanthan gum to the dry ingredients. For the glaze, use a gluten-free powdered sugar substitute. Note that gluten-free cakes may be slightly denser, so consider reducing baking time by 2-3 minutes.