
Desserts
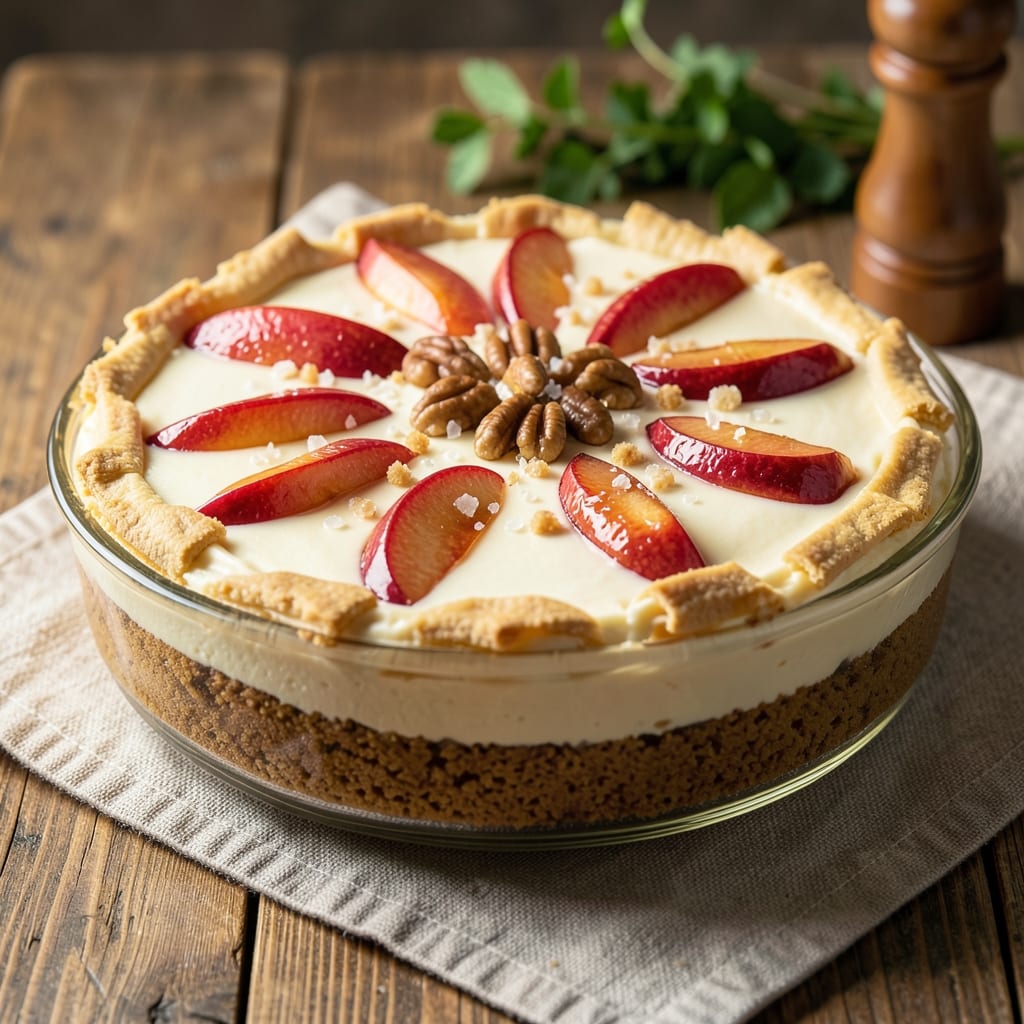
This apple crunch cheesecake recipe transforms a classic dessert into a seasonal masterpiece with layers of spiced apple filling and a buttery oat topping that adds satisfying texture. 🌟 The secret lies in balancing the creamy cheesecake base with warm apple flavors and a crispy crunch that keeps every bite exciting. I've perfected this recipe to ensure the apple filling stays perfectly tender while the oat topping achieves that ideal golden-brown crunch.
The process begins with a classic graham cracker crust, followed by a rich cream cheese filling that sets beautifully in the oven. What makes this recipe special is the homemade apple layer—sautéed with cinnamon, nutmeg, and a touch of brown sugar until tender yet still holding its shape. The final touch is the oat topping, baked until crispy and studded with chopped nuts for extra texture.
By the time you slice into this cheesecake, you'll experience a perfect harmony of creamy, spiced apple, and crunchy oat layers. The combination of warm apple flavors and cool cheesecake creates a dessert that's both comforting and sophisticated. This recipe delivers restaurant-quality results with a homemade touch that's impossible to resist.
Perfect for fall gatherings, holiday celebrations, or as a special treat for loved ones, this cheesecake comes together with precise steps and a little patience. The chilling time ensures clean slices and optimal texture, making it a showstopper for any occasion. Let's get baking!
Ingredients for apple crunch cheesecake
Eight layers of texture and flavor—crisp crust, creamy filling, spiced apples, and nutty crunch.
| Ingredient | Amount | Notes |
|---|---|---|
| Graham Cracker Crumbs 🍪 | 1 ½ cups | Finely crushed, buttery flavor preferred |
| Unsalted Butter 🧈 | ½ cup | Melted, full-fat for richness |
| Granulated Sugar 🍚 | ¼ cup | For crust sweetness |
| Large Eggs 🥚 | 4 whole | Room temperature for smooth filling |
| Cream Cheese 🧀 | 16 oz | Full-fat, room temperature |
| Sour Cream 🥛 | ½ cup | For extra creaminess |
| Vanilla Extract 🌿 | 1 tbsp | Pure extract preferred |
| Apples 🍎 | 4 medium | Honeycrisp or Granny Smith |
| Brown Sugar 🍚 | ½ cup | Packed, light or dark |
| Cinnamon 🌶️ | 2 tsp | Ground, high-quality |
| Ground Nutmeg 🌿 | ¼ tsp | Freshly grated preferred |
| Old-Fashioned Rolled Oats 🌾 | 1 ½ cups | Not quick oats |
| Light Brown Sugar 🍚 | ¼ cup | Packed, for oat topping |
| Chopped Walnuts 🥜 | ½ cup | Toasted for extra flavor |
| Salt 🧂 | ½ tsp | Fine sea salt preferred |
The apples are non-negotiable—Honeycrisp or Granny Smith hold their shape best when baked. Trader Joe's and Whole Foods carry perfect ones year-round, but local orchards in fall are unbeatable. Core them yourself for cleaner slices—no one wants a chewy bite. The cinnamon and nutmeg? Penzeys or bulk bins at natural markets have the freshest, most aromatic options. For the graham crackers, Honey Maid or Keebler work best—the buttery flavor shines through in the crust.
No cream cheese? Philadelphia brand is the gold standard, but Wise. Swap sour cream for Greek yogurt in a pinch, but it’ll be slightly tangier. Running low on apples? Dried apple pieces rehydrated add flavor, though texture will differ. The oats are crucial—old-fashioned rolled oats toast beautifully, while quick oats turn gummy. Toast your walnuts in a dry pan for 3-4 minutes—they’ll smell incredible—and chop them while warm for extra crunch.
This cheesecake needs 4-6 hours to chill—patience pays off. Store leftovers in an airtight container with parchment between layers to prevent sogginess. The apple filling keeps for 3 days in the fridge if prepped ahead, while the full cheesecake lasts 5 days. Freeze the whole thing for up to 2 months—thaw overnight in the fridge before serving. Slice with a warm knife for cleaner cuts, and always serve with a dollop of whipped cream.
Why You'll Love This Recipe
- Here’s what sold me: the tart apples cut through the richness of the cream cheese filling. Thinly sliced, they caramelize just enough to add that perfect crunch and a touch of autumnal warmth—like dessert meets a cozy hug.
- No-Fuss Layers: I swear by the graham cracker crust—just mix, press, bake. No rolling dough, no fussing with pie crusts. The butter and sugar blend into a buttery base that holds up like a dream, even if I’m not feeling particularly precise.
- Apple Magic: Here’s what sold me: the tart apples cut through the richness of the cream cheese filling. Thinly sliced, they caramelize just enough to add that perfect crunch and a touch of autumnal warmth—like dessert meets a cozy hug.
- Party in a Box: Between us, this is my go-to for gatherings. It’s easy to double the recipe, and the crunchy topping stays crispy even when sliced. Serve it at picnics, potlucks, or just because—no one will guess it took me less than an hour to pull together.
Step-by-step instructions for apple crunch cheesecake
Layer by layer, we'll build this dessert masterpiece—creamy filling meets spiced apples under a crunchy oat topping.
👨🍳 Step 1: Prepare the Crust Mixture
In a medium bowl, combine the 1.5 cups graham cracker crumbs with the 0.5 cup melted unsalted butter and 0.25 cup granulated sugar. Use a fork to mix until the crumbs are evenly moistened and the mixture resembles wet sand. This ensures the crust will hold together without crumbling when pressed.
Press the mixture firmly into the bottom of a 9-inch springform pan, creating an even layer. Use the back of a measuring cup to compact it thoroughly, especially along the edges. This step is critical—any gaps will show up as weak spots after baking. Chill the crust in the refrigerator while you prepare the filling.
🍳 Step 2: Make the Creamy Cheesecake Filling
In a large mixing bowl, beat the 16 oz cream cheese and 0.5 cup sour cream together with an electric mixer until completely smooth and creamy. This process can take 3-5 minutes—don't rush it. The mixture should be lump-free and pale yellow in color.
Gradually add the 4 whole large eggs, one at a time, mixing well after each addition. Then incorporate the 1 tbsp vanilla extract and 0.5 cup brown sugar. Mix until fully combined but be careful not to overbeat, which can make the cheesecake dense. Set the filling aside while you prepare the apple mixture.
🍳 Step 3: Cook the Spiced Apple Filling
Peel, core, and finely dice the 4 medium apples into small, even pieces—about ¼-inch cubes. In a medium saucepan, combine the diced apples with 0.5 cup brown sugar, 2 tsp cinnamon, 0.25 tsp ground nutmeg, and 0.5 tsp salt. Cook over medium heat for 8-10 minutes, stirring occasionally, until the apples soften and release their juices.
Remove the pan from heat and let the apple mixture cool slightly. This step develops the warm spiced flavor that will complement the creamy filling perfectly. The apples should be tender but still hold their shape when pressed gently with a fork.
🥘 Step 4: Assemble and Bake the Cheesecake
Preheat your oven to 350°F. Pour the cooled apple mixture evenly over the chilled crust in the springform pan. Then carefully spoon the cheesecake filling over the apples, spreading it evenly to the edges. The filling should create a smooth, even layer.
Bake for 40-45 minutes until the edges are set and the center still jiggles slightly when shaken. The cheesecake should be just set but not fully firm—it will continue cooking as it cools. Remove from the oven and let it cool completely at room temperature before adding the topping.
🍳 Step 5: Create the Crunchy Oat Topping
In a separate bowl, mix the 1.5 cups old-fashioned rolled oats, 0.25 cup light brown sugar, 0.5 cup chopped walnuts, and 0.5 tsp salt. Toast this mixture in a dry skillet over medium heat for 3-5 minutes, stirring constantly, until golden brown and fragrant. This toasting enhances the nutty flavors and creates the perfect crunch.
Sprinkle the warm oat mixture evenly over the cooled cheesecake filling. The contrast between the warm spiced apples, creamy cheesecake, and crunchy oat topping is what makes this dessert truly special. Serve chilled or at room temperature for the best texture experience.
Pro Tips For Making Apple Crunch Cheesecake
- Chill Cream Cheese First: I learned this the hard way—room-temperature cream cheese is easier to beat, but it’s a disaster for texture. Pop it in the fridge for 20-30 minutes before mixing, then let it sit out just 10 minutes while you prep the crust. This keeps the crunch from turning into a sad, dense blob.
- Toast Graham Crumbs: The crust’s job is to stay crisp, not turn into a soggy mess. Spread the graham crumbs and butter in the pan, then bake at 325°F for 5 minutes before adding the filling. That extra step makes all the difference—no one likes a mushy base.
- Whip Eggs Slowly: Dump eggs in too fast, and you’ll end up with curds. Beat them in one at a time, mixing just until combined after each addition. If the batter looks curdled, strain it—smooth filling equals a perfect slice.
- Press Apples Dry: Sounds weird, but it works: Toss sliced apples with sugar and lemon juice, then drain them for 10 minutes in a colander. Less moisture means less weeping in the oven, and your crunch stays crispier longer. (Yes, even if you’re impatient like me.)
Dietary considerations for these flavors
Gluten-Free Adaptations
Swap the graham cracker crust for a gluten-free digestive biscuit crumb mix—I love Trader Joe's or King Arthur Flour blends. Mix with 0.5 cup melted butter and 0.25 cup granulated sugar, then press into your springform pan. For extra stability, add 1 tbsp cornstarch to the crumb mixture to prevent crumbling during baking. 🌾
Dairy-Free Options
Replace the cream cheese with Kite Hill almond milk-based cream cheese (16 oz) and use full-fat coconut milk yogurt instead of sour cream. For the crust, melt vegan butter (like Miyoko's) and ensure your graham crackers are certified dairy-free. The texture stays rich but becomes slightly lighter—perfect for those avoiding lactose.
Lower Sugar Swaps
Reduce the brown sugar in the apple filling by 25% (use 0.375 cup) and replace 0.25 cup with monk fruit sweetener or erythritol (1:1 ratio). In the crust, use 0.125 cup granulated sugar and 0.125 cup coconut sugar for a lower-glycemic option. The cheesecake filling can use 0.25 cup honey instead of brown sugar for natural sweetness.
Nut-Free Crunch
Skip the walnuts and toast 1.5 cups gluten-free oats with 0.25 cup light brown sugar and 1 tsp cinnamon until golden. For extra crunch, stir in 0.5 cup crushed gluten-free pretzels (like Snyder's) during the final 2 minutes of toasting. This keeps the texture satisfying while eliminating nuts entirely. 🥜
Vegan Cheesecake Base
Blend 16 oz firm tofu with 0.5 cup coconut cream, 1 tbsp lemon juice, and 1 tbsp vanilla extract until ultra-smooth. Add 0.5 cup maple syrup and 0.25 cup cornstarch (for stability). Pour over the gluten-free crust and bake at 350°F for 50-55 minutes—it’ll set firmer than dairy cheesecake but still be creamy. Chill for 6+ hours before adding toppings. 🌱
Nutrition facts
Frequently asked questions
Can I make this cheesecake ahead of time?
The perfect time to assemble this dessert is 1 day in advance. After baking and adding the oat topping, let it cool completely, then refrigerate for 4-6 hours before serving. The flavors meld beautifully overnight, and the crunch topping stays crisp. For best results, store leftovers in an airtight container with parchment between layers to prevent sogginess.
What's the secret to getting the oat topping perfectly crispy?
Toast the oat mixture in a dry skillet over medium heat for 3-5 minutes until golden brown and fragrant. The key is constant stirring to prevent burning. For extra crunch, spread the toasted mixture evenly over the cooled cheesecake and press down lightly with a spoon. Let it sit for 10 minutes before slicing to allow the crunch to set fully.
Can I use canned apple pie filling instead of fresh apples?
While you can use canned filling in a pinch, fresh apples create a much better texture and flavor. If you must use canned, drain it well and simmer with 1 tsp cinnamon and 0.25 tsp nutmeg for 5 minutes to thicken it. The apples should still hold their shape when baked, so avoid overly mushy fillings. Freshly cooked apples release their juices and create a more vibrant layer.
Why did my cheesecake crack on top?
Cracking usually happens from one of three issues: overbaking, cooling too quickly, or opening the oven door early. Always bake until the edges are set but the center still jiggles slightly. Let it cool at room temperature for 1 hour before refrigerating, and avoid sudden temperature changes. If cracks appear, cover them with extra whipped cream or caramel sauce before serving.
What's the best way to serve this cheesecake?
Serve chilled for the best texture contrast between the creamy filling and crispy topping. A dollop of whipped cream or a drizzle of caramel sauce enhances the apple flavors. For a festive touch, garnish with a sprinkle of cinnamon or chopped pecans. This cheesecake pairs beautifully with hot apple cider or coffee for a cozy dessert experience.