
Desserts
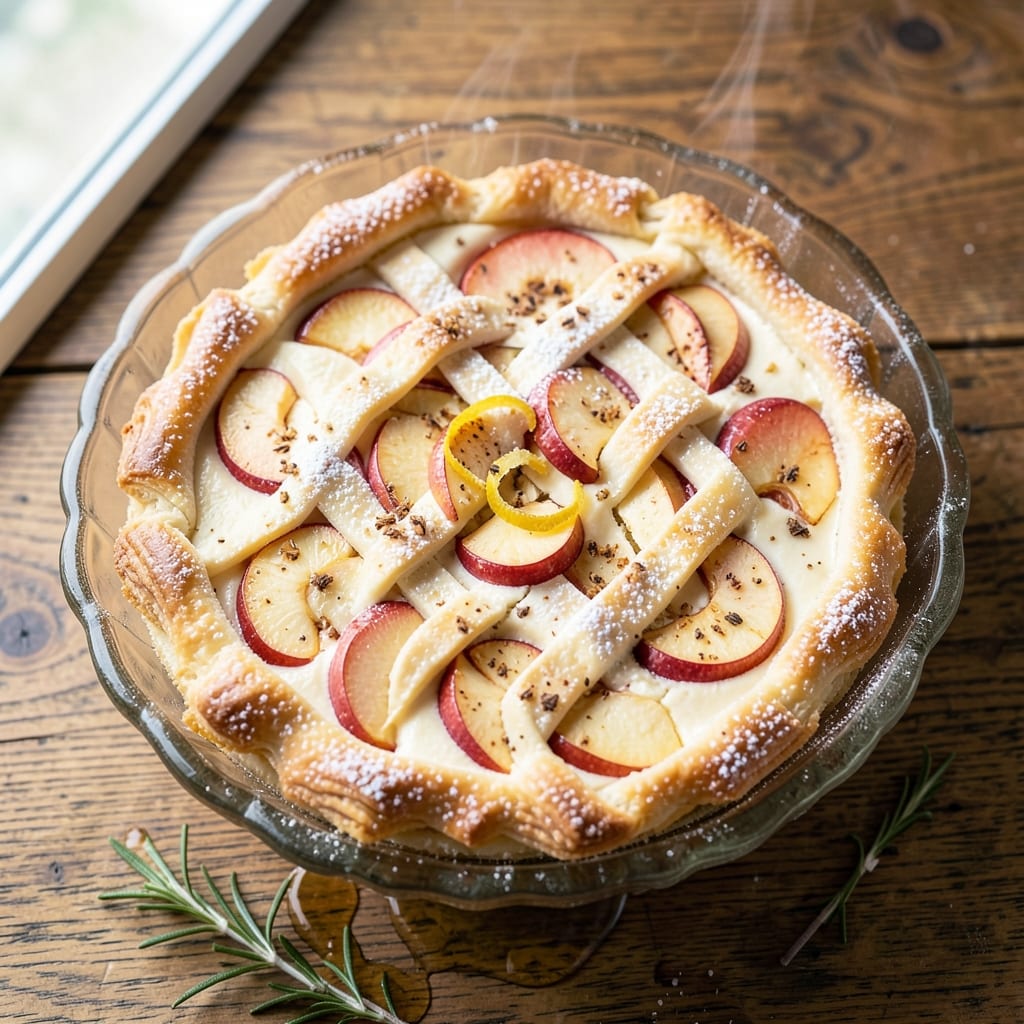
Apple cheesecake pastry recipe combines the best of two worlds—flaky, buttery pastry and a rich, spiced apple filling layered over creamy cheesecake. This dessert delivers the comforting flavors of fall in every bite, with a perfect balance of textures: crisp crust, silky cheesecake, and tender apple slices. I've perfected the technique to ensure no cracks in the cheesecake and a golden, tender pastry that holds up to the filling.
The secret to this recipe lies in the pastry base, which gets partially baked to create a sturdy foundation before adding the cheesecake layer. A water bath during baking prevents cracks while keeping the center perfectly set. The apple filling—simmered with cinnamon, nutmeg, and a touch of brown sugar—adds a warm, aromatic contrast to the tangy cheesecake, making each slice irresistible.
What you'll end up with is a dessert that's restaurant-quality at home—layers of buttery pastry, velvety cheesecake, and caramelized apples that melt in your mouth. The combination of textures and flavors makes this a showstopper for gatherings, holidays, or whenever you crave something sweet yet sophisticated. Every step is designed to ensure success, even for beginners.
Ready in about 2 hours (including chilling time), this recipe is perfect for special occasions or a cozy weekend treat. Garnish with whipped cream, a drizzle of caramel, or a sprinkle of cinnamon for an extra touch of elegance. Let's get started!
Ingredients for apple cheesecake pastry
Buttery pastry, velvety cheesecake, and caramelized apples—this dessert delivers restaurant-quality layers in every bite.
| Ingredient | Amount | Notes |
|---|---|---|
| All-Purpose Flour 🌾 | 2 ½ cups | Sifted for light texture |
| Unsalted Butter 🧈 | 1 cup | Cold, cubed for pastry |
| Granulated Sugar 🍚 | ½ cup | For pastry sweetness |
| Large Eggs 🥚 | 1 whole | Room temperature preferred |
| Vanilla Extract 🌿 | 1 tsp | Pure, high-quality extract |
| Salt 🧂 | ½ tsp | Fine sea salt preferred |
| Cream Cheese 🧀 | 16 oz | Room temperature, full-fat |
| Heavy Cream 🥛 | 1 cup | Whole milk fat preferred |
| Sour Cream 🥛 | ½ cup | Full-fat for creaminess |
| Granulated Sugar 🍚 | 1 ½ cups | For cheesecake sweetness |
| Cinnamon 🌶️ | 2 tsp | Ground, aromatic variety |
| Ground Nutmeg 🌿 | ½ tsp | Freshly grated preferred |
| Light Brown Sugar 🍚 | ¼ cup | Packed, for apple filling |
| Apples 🍎 | 4 medium | Honeycrisp or Granny Smith |
| Lemon Juice 🍋 | 2 tbsp | Freshly squeezed |
| Unsalted Butter 🧈 | 2 tbsp | For apple filling |
The cream cheese is non-negotiable—Philadelphia brand is my go-to, but any full-fat block works. For the pastry, European-style butter makes all the difference (like Plugrá or Land O'Lakes European Style). If you can't find it, regular unsalted butter chilled overnight is fine. The apples? Honeycrisp or Granny Smith—they hold their shape during baking while still caramelizing beautifully. I always peel and slice them uniformly (about 1/4-inch thick) for even cooking.
No vanilla extract? Vanilla bean paste works great, or 1 tsp vanilla sugar in a pinch. Running short on sour cream? Greek yogurt at half the amount keeps the tang. The brown sugar in the apple filling can be swapped for white sugar plus 1/4 tsp cinnamon if needed. For a richer pastry, add 1 tbsp powdered sugar to the dough—it makes the crust extra tender. And trust me, room-temperature cream cheese blends so much smoother than cold.
Pastry dough should be wrapped tightly and chilled for at least 2 hours—up to 48 hours for maximum flakiness. The cheesecake filling keeps 3 days in the fridge, but the apple topping is best used fresh. For make-ahead convenience, bake the pastry crust 2 days ahead and store at room temperature. The full assembled dessert holds 4 days covered in the fridge—just bring to room temp before slicing for clean cuts.
Why You'll Love This Recipe
- No-Fuss Assembly: I swear by this crust—just flour, butter, and a pinch of salt. You don’t even need a food processor; a fork and cold butter cubes do the trick in minutes. Honestly, the hardest part is waiting for the oven.
- Sweet-Tart Magic: That caramelized apple filling meets the creamy cheesecake layer—it’s like autumn in a bite. The vanilla extract ties everything together, making it taste like a bakery’s secret.
- Weeknight Crowd-Pleaser: Serve it warm with ice cream or let it chill for a dessert that works at brunch, potlucks, or even school bake sales. My kids beg for seconds, and my husband’s the only one who gets the last slice.
- Budget-Friendly Luxury: Uses pantry staples you already own, and the leftovers? Even better the next day. I’ve made this for $10 and fed six people—no one ever guesses it’s this simple.
Step-by-step instructions for apple cheesecake pastry
Here's how to craft a buttery, flaky crust and spiced apple filling that'll make your apple cheesecake the star of any dessert spread.
Prepare the Perfect Pastry Dough
In a large bowl, combine the 2.5 cups all-purpose flour with the 0.5 cup granulated sugar and 0.5 tsp salt. Whisk gently to distribute evenly—this ensures consistent sweetness and texture throughout the crust. Cut in the 1 cup cold, cubed unsalted butter using a pastry cutter or your fingers until the mixture resembles coarse crumbs with pea-sized butter pieces. This cold butter creates those signature flaky layers when baked.
Add the 1 whole large egg and 1 tsp vanilla extract, mixing just until the dough comes together. Avoid overworking—press the dough into a disc, wrap in plastic, and chill for at least 1 hour (or up to 24 hours). This resting period relaxes the gluten, preventing shrinking during baking. For best results, keep the dough cold until ready to roll.
Assemble the Apple Filling
Peel, core, and finely dice the 4 medium apples (Honeycrisp or Granny Smith work beautifully). Toss them with 2 tbsp lemon juice to prevent browning and enhance their natural sweetness. In a medium saucepan, melt the 2 tbsp unsalted butter over medium heat, then add the apple mixture. Cook for 5-7 minutes until the apples soften but still hold their shape—you want them tender yet slightly firm for texture.
In a separate bowl, whisk together 0.25 cup packed light brown sugar, 2 tsp cinnamon, and 0.5 tsp ground nutmeg. Stir this spiced sugar into the cooked apples and simmer for another 2-3 minutes until the mixture thickens slightly. Let the filling cool completely before assembling—this prevents steam from making your crust soggy. The warm spices will infuse the apples beautifully, creating that cozy autumnal flavor.
Create the Cheesecake Layer
In a separate large bowl, beat the 16 oz cream cheese until completely smooth—no lumps allowed. Gradually add the 1 cup heavy cream and 0.5 cup sour cream, mixing on low speed until just combined. In a separate bowl, whisk together 1.5 cups granulated sugar with 1 tsp vanilla extract, then gently fold this into the cream cheese mixture. The batter should be thick but pourable—this ensures a creamy, not dense, cheesecake layer.
Pour half of the cheesecake batter into the pre-baked crust. Spoon the cooled apple filling evenly over the cheesecake layer, then top with the remaining batter. Use a small offset spatula to create gentle swirls—this adds visual appeal while keeping the layers distinct. Tap the pan gently on the counter to release any air bubbles that might have formed during assembly.
Bake to Golden Perfection
Preheat your oven to 350°F. Place the assembled cheesecake on a baking sheet lined with parchment paper—this prevents any potential spills from sticking. Bake for 45-50 minutes until the edges are golden brown and the center is just set (it'll continue cooking slightly after removal). The top should be slightly puffed but not cracked—insert a toothpick near the center; it should come out with a few moist crumbs, not wet batter.
Remove from the oven and let cool in the pan for 15 minutes, then transfer to a wire rack to cool completely. For best texture, chill in the refrigerator for at least 4 hours (overnight is ideal). This resting period allows the layers to fully set, resulting in clean slices with that perfect balance of flaky crust, creamy cheesecake, and spiced apple filling. Serve chilled with a dollop of whipped cream or caramel drizzle for an extra touch of indulgence.
Pro Tips For Making Apple Cheesecake Pastry
- Chill the Butter First: I learned this the hard way—cutting cold butter into flour creates flakier layers than room-temperature butter ever will. Take the butter out of the fridge 20 minutes before mixing, or even better, freeze it for 10 minutes first. The pastry will thank you with crisp, buttery layers that hold up to the cheesecake filling.
- Weigh Your Flour: Scooping flour from the bag packs it too tightly, and that’s how you end up with a dense, tough pastry. Use a kitchen scale for precision—120g of all-purpose flour is the sweet spot for this recipe. If you’re eyeballing it, spoon the flour into the drier, then level it off with a knife. Trust me, your crust will be lighter.
- Press the Crust Firmly: Don’t just dump the dough and hope for the best. Press it evenly into the pan with your fingers, making sure every inch of the bottom gets covered. Use a glass to flatten it out if needed, and poke a few holes with a fork to prevent air pockets. This isn’t the prettiest method, but it’s the tastiest—no soggy bottoms here.
- Bake the Crust Alone: Skip the shortcut of blind-baking later—bake the crust for 12-15 minutes before adding the filling. The heat will firm it up, and the edges will set properly. If it starts browning too fast, cover it loosely with foil. This guarantees your pastry stays crisp under the cheesecake, not mushy. (Yes, even if you’re impatient like me.)
Troubleshooting perfect results
Soggy Pastry Fix
If your pastry crust turns soggy after baking, it’s usually from steam or insufficient pre-baking. First, blind-bake the crust for 12-15 minutes at 375°F before adding the cheesecake layer—this creates a sturdy barrier. For extra insurance, sprinkle a thin layer of crushed cornflakes or graham cracker crumbs between the crust and cheesecake filling. These absorb any moisture during baking. 🌟
Cracked Cheesecake
Cracks often happen when the cheesecake bakes too quickly or the oven runs hot. To prevent this, bake at 325°F instead of 350°F for the first 30 minutes, then increase to 350°F for the remaining time. Another trick? Place a water bath around the pan—fill a baking sheet with hot water and set your cheesecake pan on top. This slows heat penetration and reduces cracking. If cracks appear, cover them with extra whipped cream or caramel sauce—they’ll disappear!
Apple Filling Too Watery
If your apple filling releases too much liquid during baking, reduce it further before assembling. Simmer the spiced apples for an extra 2-3 minutes until syrupy, then spread a thin layer of sour cream or Greek yogurt between the cheesecake and apple filling. This acts as a moisture barrier. For a firmer texture, add 1 tsp cornstarch to the apples while cooking—it thickens the filling beautifully. 🍎
Cheesecake Not Setting
A runny cheesecake usually means the oven wasn’t hot enough or the batter was too thin. Ensure your cream cheese is fully room temperature (no cold lumps!) and whisk the batter until it’s thick but pourable. For extra stability, add 1 tbsp unflavored gelatin (dissolved in 2 tbsp warm water) to the cheesecake mixture. Bake until the center is just set (toothpick with moist crumbs, not liquid), then chill at least 4 hours—this firms up the texture completely.
Pastry Shrinking During Baking
Shrinking happens when the dough isn’t chilled long enough or overworked. Always rest the dough for at least 1 hour (up to 24 hours) before rolling. Press it gently into the pan, leaving a ½-inch overhang—this prevents gaps. For extra strength, add 1 tbsp powdered sugar to the dough. If it still shrinks, try a thinner crust (about ⅛-inch thick) and bake it longer at a lower temp (350°F for 15 minutes before adding filling).
Nutrition facts
Frequently asked questions
Can I make this apple cheesecake without a water bath?
While a water bath prevents cracks, you can skip it by baking at 325°F for the entire 50-55 minutes. Use a springform pan and avoid opening the oven door during baking. For extra insurance, cover the edges with aluminum foil to slow heat penetration. The texture will be slightly denser but still delicious!
What's the best way to store leftovers?
Keep the cheesecake in an airtight container in the fridge for up to 5 days. For serving, let it sit at room temperature for 15-20 minutes to soften the layers. The pastry stays crispy when properly stored—just avoid stacking slices directly on top of each other to prevent squishing.
Can I substitute the pastry crust with something else?
Try a graham cracker crust (crushed cookies + melted butter) or a gingersnap crumble for extra spice. For a lighter option, use a pre-made puff pastry—just brush with egg wash before baking. The key is ensuring your crust can handle the cheesecake's moisture without getting soggy.
Why does my cheesecake have cracks?
Cracks usually appear from uneven baking or rapid temperature changes. Prevent them by: 1) Baking at 325°F for the first 30 minutes before increasing to 350°F 2) Using a water bath (pan in a larger baking dish with hot water) 3) Avoiding opening the oven door during baking Cover cracks with whipped cream or caramel sauce—they won't affect the taste!
How do I make this recipe gluten-free?
Replace the all-purpose flour with a 1:1 gluten-free baking flour blend (like Bob's Red Mill). For the pastry, add ½ tsp xanthan gum to help bind the dough. Use gluten-free oats for any crumb toppings. The cheesecake layer remains the same—just ensure all ingredients are certified gluten-free.