
Desserts
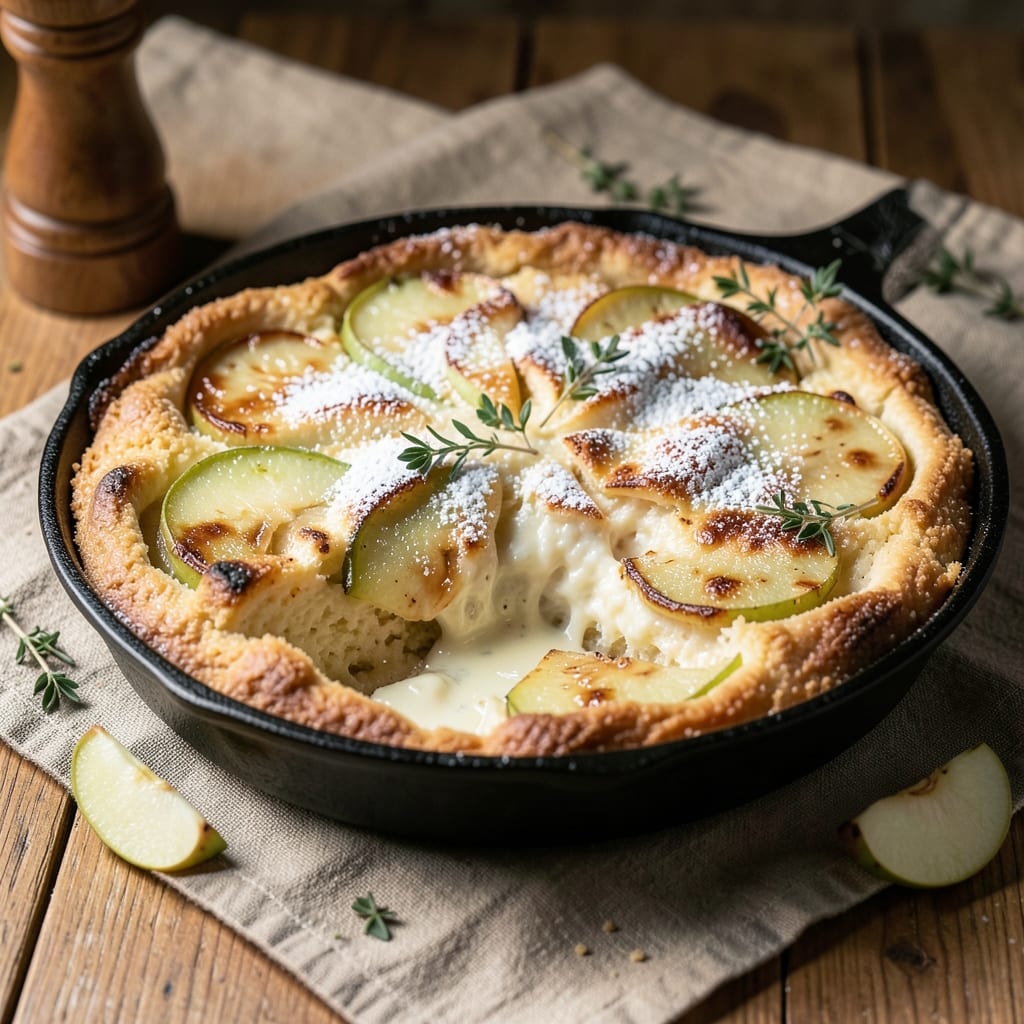
This apple cheesecake dump cake recipe combines the creamy richness of cheesecake with the comforting warmth of spiced apples—all in one effortless bake. The magic happens when tender apples caramelize atop a luscious cheesecake filling, creating a dessert that’s foolproof yet feels like a gourmet treat. No layers, no fuss, just pure comfort in every bite.
The secret lies in the balance: a creamy cheesecake center that stays soft while the apples develop deep caramelized notes. I’ve perfected this recipe to deliver that perfect texture—tender, spiced apples that melt into the cheesecake filling without turning mushy. The best part? It’s ready in under an hour, with minimal prep and one-pan simplicity.
What makes this recipe special is how it transforms ordinary ingredients into something extraordinary. The apples release their natural sugars as they bake, creating a sticky, caramelized topping that contrasts beautifully with the cool, velvety cheesecake beneath. A sprinkle of cinnamon and a touch of vanilla elevate the flavors to restaurant-quality levels.
Whether you’re serving this for a cozy family dinner or a special dessert occasion, it’s a crowd-pleaser that requires no fancy techniques—just patience while it bakes. The result? A dessert that’s warm, spiced, and impossibly creamy, with every slice offering a perfect balance of textures and flavors. Let’s get baking!
Ingredients for apple cheesecake dump cake
These 13 ingredients transform into a restaurant-worthy dessert with just one pan and 45 minutes.
| Ingredient | Amount | Notes |
|---|---|---|
| Granny Smith Apples 🍎 | 4 medium | Peeled, cored, sliced thin |
| Cream Cheese 🧀 | 16 oz | Room temperature, full-fat |
| Granulated Sugar 🍚 | 1 ½ cups | White or light brown |
| All-Purpose Flour 🌾 | 1 ½ cups | Sifted for smooth batter |
| Large Eggs 🥚 | 4 whole | Room temperature, beaten |
| Vanilla Extract 💧 | 1 tbsp | Pure extract preferred |
| Ground Cinnamon 🌿 | 2 tsp | Freshly ground preferred |
| Salt 🧂 | ½ tsp | Fine sea salt preferred |
| Unsalted Butter 🧈 | ½ cup | Melted, for greasing pan |
| Lemon Juice 🍋 | 1 tbsp | Freshly squeezed |
| Cream of Tartar 🍯 | ¼ tsp | For stable whipped cream |
| Heavy Whipping Cream 🥛 | 1 cup | Cold, for topping |
| Powdered Sugar 🍚 | ¼ cup | For dusting topping |
The cream cheese is non-negotiable—full-fat, room-temperature blocks melt perfectly and create that signature velvety texture. Philadelphia or Kraft work best, but any brand will do if it's not low-fat. The apples? Granny Smiths hold their shape while baking, but Honeycrisp or Fuji add natural sweetness if you prefer. Peel and slice them paper-thin for even cooking—this is where the magic happens. For the cinnamon, Penzeys or bulk bins at Whole Foods give the deepest flavor, but the grocery store stuff works fine. Pre-sift your flour to avoid lumps in the batter—trust me, it makes all the difference.
No heavy cream? Whipped coconut cream works in a pinch, though the texture will be slightly lighter. Running short on cream cheese? Substitute ricotta at the same weight, but add an extra egg for structure. The powdered sugar topping can be swapped for crushed graham crackers if you're feeling fancy—just toast them first for crunch. For the vanilla, real extract (not imitation) delivers that warm, rich flavor. If you're baking for a crowd, double the recipe—this dessert reheats beautifully, so make extra for leftovers. The lemon juice might seem like a small detail, but it brightens the whole dish and balances the sweetness perfectly.
This dessert tastes even better the next day—cover and refrigerate leftovers for up to 4 days. For serving, dust with powdered sugar and a sprinkle of cinnamon right before cutting. Store the cream cheese mixture in the fridge in an airtight container for up to 5 days, and the apples can be prepped a day ahead. The pan? Grease it well with butter or oil, and use parchment paper for easy removal. If you're worried about sogginess, bake it at 325°F instead of 350°F—the slower cook keeps the center perfectly set while the apples caramelize beautifully.
Why You'll Love This Recipe
- Five-Ingredient Magic: I swear, this is the kind of recipe where you look at the list and think, "How is this even real?"—then bake it and realize it’s genius. Granny Smiths add that sharp tang, while the cream cheese keeps it rich without being heavy. No fancy layers, no fuss.
- Tangy-Sweet Bliss: That first bite? It’s like fall in your mouth—the apples stay slightly crisp, the cheesecake base is velvety, and the sugar caramelizes just enough to make you want to eat it straight from the pan. Honestly, I’ve never met a dessert that balances sweet and tart this well.
- Weeknight Hero: Between us, this is my go-to when I need something impressive but don’t want to slave away. Double the batter, bake two pans, and boom—you’ve got dessert for a dinner party or a lazy Sunday. (Yes, even on a Tuesday night.)
- Leftovers? Please.: The best part? It reheats like a dream. Slice it up the next day, microwave for 20 seconds, and it’s just as good—if not better—than fresh. My kids actually ask for it, and that’s saying something.
Step-by-step instructions for apple cheesecake dump cake
This dump cake comes together in one bowl with minimal effort, delivering layers of creamy cheesecake and spiced apples in every bite.
Prep the Apples and Grease the Pan
Start by peeling, coring, and slicing the 4 medium Granny Smith Apples into thin, even rounds—about ¼-inch thick. Toss them with 1 tablespoon Lemon Juice to prevent browning while you work. Meanwhile, melt the ½ cup Unsalted Butter and use it to generously grease a 9-inch pie dish or cast-iron skillet. This ensures the cake won't stick, especially with the rich cheesecake filling.
Arrange the apple slices in a single layer at the bottom of the pan, slightly overlapping them like shingles. If using all the apples, you may need a second layer, but keep the slices uniform for even baking. The tartness of the Granny Smiths balances the sweetness perfectly—don't skip this step!
Whisk the Cheesecake Batter
In a large bowl, beat the 16 oz Cream Cheese at room temperature with an electric mixer until completely smooth—no lumps allowed. This takes about 2-3 minutes on medium speed. Gradually add the 1.5 cups Granulated Sugar while mixing, then incorporate the 4 whole Large Eggs, one at a time, mixing well after each addition. The batter should be thick and pale, almost like a custard.
Next, whisk in the 1.5 cups All-Purpose Flour, 2 teaspoons Ground Cinnamon, and ½ teaspoon Salt until fully combined. Stir in the 1 tablespoon Vanilla Extract and the remaining 1 tablespoon Lemon Juice. The mixture will look dense but should hold its shape when spooned. If it seems too thick, add 1-2 tablespoons of cold water to loosen it slightly—this ensures the cake rises properly.
Layer and Bake the Dump Cake
Pour the cheesecake batter evenly over the apple slices in the pan, spreading it into the corners with a spatula. The apples should be fully submerged, but don't worry if they peek through—this creates pockets of melty cheesecake flavor. Preheat your oven to 350°F while the batter rests for 5 minutes to let the flour hydrate fully.
Bake the cake for 45-50 minutes, until the edges are golden brown and a toothpick inserted near the center comes out clean. The top may look slightly puffed but not overly crisp. If the edges brown too quickly, loosely tent the pan with foil after 30 minutes to prevent over-browning. The apples should be tender, and the cheesecake layer should pull away from the pan edges slightly.
Prepare the Whipped Cream Topping
While the cake bakes, chill the 1 cup Heavy Whipping Cream in the refrigerator for 10 minutes to ensure it's ice cold. In a separate bowl, whip the cream with the ¼ teaspoon Cream of Tartar and ¼ cup Powdered Sugar until soft peaks form. This stabilizer keeps the whipped cream light and airy without over-sweetening it. Avoid over-whipping, or the cream will turn buttery.
Once the cake is done, let it cool in the pan for 10 minutes—this prevents the cheesecake layer from cracking when you transfer it. Then, carefully invert the cake onto a serving plate (or serve directly from the pan if preferred). Top each slice immediately with the whipped cream, dusting lightly with extra Powdered Sugar for a bakery-style finish.
Serve Warm with Extra Spice
Slice the cake into 8 wedges and serve warm, straight from the oven. The contrast of warm, spiced apples and creamy cheesecake with cool whipped cream is pure magic. For extra warmth, sprinkle each serving with an additional pinch of Ground Cinnamon and a drizzle of Lemon Juice to brighten the flavors. This cake is best enjoyed within 2 hours of baking while the apples are still tender and the cheesecake layer is gooey.
Pro Tips For Making Apple Cheesecake Dump Cake
- CHOP APPLES UNIFORMLY: Granny Smiths stay firm when sliced into ¼-inch pieces—no need for fancy dicing. I learned this the hard way when my first batch turned out mushy because I left some chunks too thick. A quick run through a food processor (pulse, don’t blend) saves time and keeps texture consistent.
- SOFTEN CREAM CHEESE FIRST: Take the cream cheese out of the fridge 30 minutes before mixing—room temperature blends smoother and avoids lumps. I used to just dump it straight from the fridge, and the batter always looked streaky. Trust me, your cake will be lighter if you skip this step.
- DON’T OVERMIX THE BATTER: Stir just until the flour disappears—overmixing makes the cake dense. I was aggressive with my whisk once and ended up with a brick instead of a tender crumb. A few gentle folds with a spatula is all it takes.
- BAKE UNTIL GOLDEN, NOT JUST SET: Pull it out when the edges are golden and the center springs back slowly—not when it looks "done." I’ve pulled cakes too early and ended up with a gummy middle. If unsure, check at 30 minutes and tent with foil if browning too fast.
Perfect pairings for this recipe
Caramelized Apple Sauce
Serve your apple cheesecake dump cake with a side of homemade caramelized apple sauce—simmer 2 cups diced apples (peeled, cored), ¼ cup brown sugar, 1 tsp cinnamon, and 2 tbsp butter for 15 minutes until thickened. The sauce adds extra depth and complements the warm spices in the cake beautifully. 🍏
Vanilla Bean Ice Cream
A scoop of homemade vanilla ice cream elevates this dessert to next-level comfort. Use a high-quality vanilla bean or 2 tsp pure vanilla extract in your base. The cool creaminess balances the warm, spiced cake perfectly. For extra indulgence, swirl in a spoonful of apple compote before freezing. 🍦
Warm Spiced Whipped Cream
Skip the cold whipped cream topping and go for warm spiced whipped cream instead. Heat 1 cup heavy cream with 2 tbsp brown sugar and ½ tsp cinnamon until steaming, then whip until fluffy. This adds a cozy, dessert-like touch that pairs wonderfully with the cake’s warm flavors. ✨
Coffee or Chai Tea
For a sophisticated pairing, serve with a hot cup of coffee or spiced chai tea. The bitterness of coffee cuts through the richness, while chai’s cinnamon and cardamom notes enhance the cake’s warm spices. A splash of vanilla syrup in your coffee adds an extra layer of harmony. ☕
Crispy Graham Cracker Crust
Add a crunchy graham cracker crust to your serving plate by lightly toasting 1 cup crushed graham crackers with 2 tbsp melted butter and 1 tbsp sugar until golden. This adds texture contrast and makes the dessert feel even more indulgent. 🍪
Fresh Berries
Brighten the plate with a handful of fresh berries like raspberries or blueberries. Their tartness balances the sweetness of the cake, and the pop of color makes the dessert look even more inviting. A simple sprinkle of mint leaves adds a fresh, unexpected twist. 🍓
Nutrition facts
Frequently asked questions
Can I use a different type of apple for this recipe?
While Granny Smith apples work best for their tartness and firm texture, you can substitute with Honeycrisp or Fuji for natural sweetness. Avoid overly soft apples like McIntosh, as they'll turn mushy during baking. The key is thin, even slices—about ¼-inch thick—to ensure perfect caramelization.
Why did my cheesecake layer crack?
Cracking usually happens when the cake cools too quickly or the oven temperature fluctuates. To prevent this, let the batter rest for 5 minutes before baking, and avoid opening the oven door during the first 30 minutes. If cracks appear, they're still safe to eat—just brush them with a simple syrup (equal parts sugar and water) before serving to add moisture.
Can I make this recipe without eggs?
Yes! Replace the 4 eggs with a flax egg substitute (1 tbsp ground flaxseed + 3 tbsp water per egg) or silken tofu (¼ cup blended per egg). For best texture, use an egg replacer that adds moisture, like applesauce (¼ cup per egg). The cheesecake layer may be slightly denser but will still be delicious.
How do I store leftovers?
Store leftovers in an airtight container in the refrigerator for up to 4 days. Reheat individual slices in the microwave for 20-30 seconds to restore the creamy texture. For longer storage, freeze portions (without whipped cream) for up to 3 months. Thaw overnight in the fridge before reheating.
Can I add nuts or chocolate to this recipe?
Fold in ½ cup chopped walnuts or pecans with the cheesecake batter for crunch, or sprinkle mini chocolate chips over the apples before baking. For extra decadence, drizzle melted chocolate over each slice before adding whipped cream. Just be mindful of portion sizes—this is already a rich dessert!