
Desserts
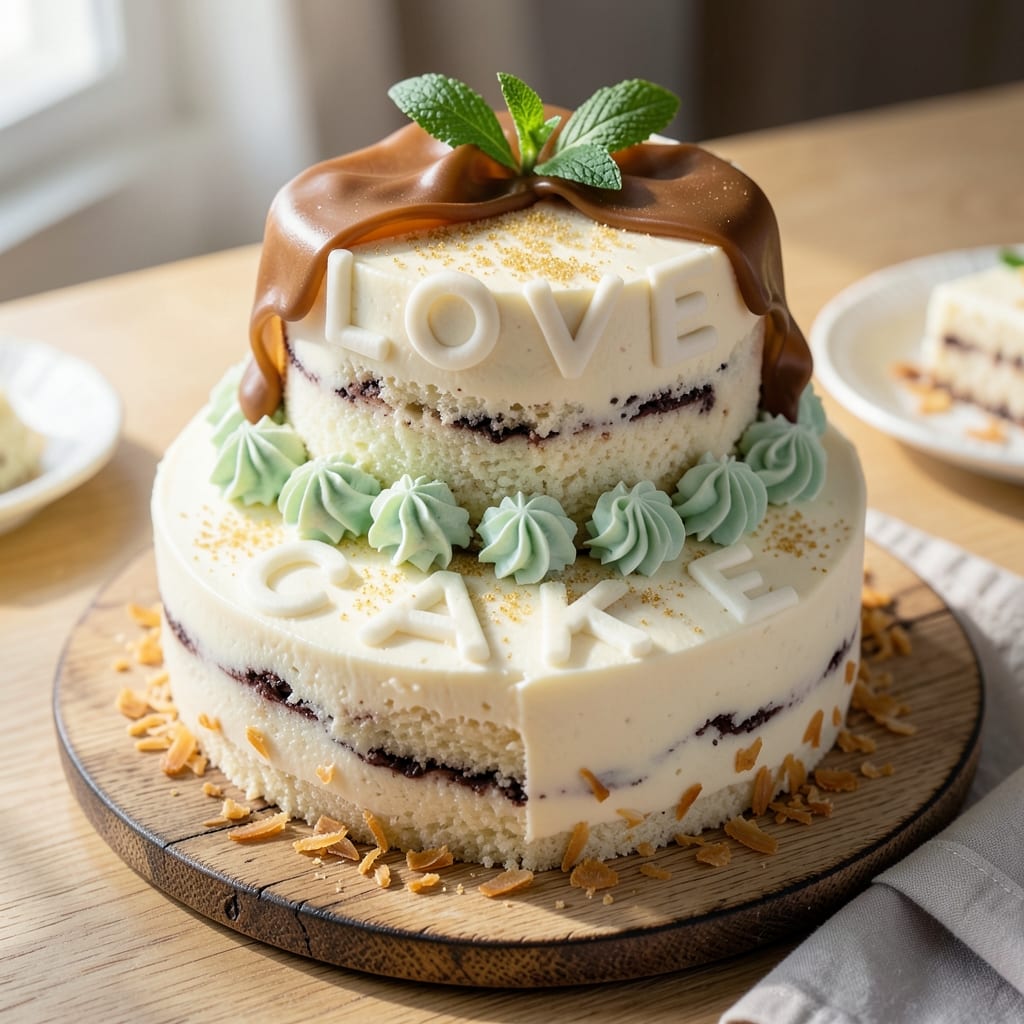
This alphabet cake recipe transforms a simple vanilla cake into a vibrant, educational celebration that kids will adore. 🎉 Perfect for birthdays or learning milestones, it combines easy baking with creative decorating to create a showstopping centerpiece that doubles as a fun activity. The key is baking a single sheet cake and using store-bought letter cutters or fondant to spell out names, words, or even the alphabet itself.
What makes this recipe special is its beginner-friendly approach—no advanced baking skills required. You'll bake a moist vanilla cake with a simple buttercream frosting that serves as your canvas. The real magic happens in the decorating phase, where you can use pre-made letter cookies, fondant letters, or even pipe letters from frosting. I've included foolproof techniques for both methods, so you can choose what works best for your skill level.
The result is a cake that's as delicious as it is visually impressive, with each letter perfectly proportioned and vibrantly colored. Kids will love helping with the decorating process, making this more than just dessert—it's a memorable experience. The cake stays fresh for days, so you can enjoy it as a centerpiece or serve slices throughout the celebration.
Whether you're celebrating a first birthday, a child learning their letters, or just want a unique party cake, this alphabet cake delivers. Let's get started with a recipe that's equal parts fun and foolproof!
Ingredients for alphabet cake
Twelve simple ingredients transform into a vibrant alphabet cake that kids will love decorating themselves.
| Ingredient | Amount | Notes |
|---|---|---|
| All-Purpose Flour 🌾 | 2 ½ cups | Sifted for light texture |
| Granulated Sugar 🍚 | 1 ½ cups | White or light brown |
| Unsalted Butter 🧈 | 1 cup | Room temperature, full-fat |
| Large Eggs 🥚 | 2 whole | Room temperature |
| Vanilla Extract 🌿 | 1 tbsp | Pure extract preferred |
| Baking Powder 🍞 | 2 tsp | Aluminum-free preferred |
| Salt 🧂 | ½ tsp | Fine sea salt |
| Milk 🥛 | ½ cup | Whole milk preferred |
| Food Coloring 🎨 | 2 tbsp | Gel-based, assorted colors |
| Buttercream Frosting 🍰 | 3 cups | Store-bought or homemade |
| Pre-Made Letter Cookies 🔤 | 24 pieces | Alphabet letters, 1-inch size |
| Fondant 🎀 | 1 lb | Assorted colors for letters |
The flour and butter are your foundation—King Arthur Flour or Bob's Red Mill for the best texture, but any all-purpose works. Butter should be soft but not melted (press a finger in, it should leave a slight indent). Wilton or Baker's Joy food coloring gives vibrant hues without altering cake consistency. For the letters, Wilton letter cutters are the gold standard, but any alphabet-shaped cookie cutter works. Fondant? Wilton or Sizzle brand rolls out smoothly—avoid the ultra-sticky budget brands.
No letter cookies? Pipe letters from frosting using a piping bag and round tip—it's trickier but just as fun. Running short on fondant? Use colored sugar sprinkles to decorate the letters instead. The cake batter can be divided into colored batches (use separate bowls!) for a marbled effect. Need to adjust sweetness? Reduce sugar by 0.25 cup if you prefer a less sweet cake. The milk can be swapped for cream or buttermilk for richer flavor, but stick with whole milk for the classic texture.
Batter keeps for 2 days in the fridge—just let it sit at room temp 30 minutes before baking. Fondant letters stay fresh 3 days wrapped in plastic, but pipe decorations dry out faster. Store the cake in a cool, dry place away from direct sunlight—2-3 days max for best texture. Freeze unfrosted layers for 3 months if prepping ahead. Kids love assembling the letters, so set up a decorating station with small bowls of sprinkles and edible glue!
Why You'll Love This Recipe
- No Mixer Needed: I swear by this recipe when my mixer’s on the fritz—just cream the butter and sugar by hand until it’s light and fluffy. The eggs and vanilla blend right in without a fuss, and the flour comes together like a dream. (Yes, even when I’m distracted by a crying toddler.)
- Vanilla Butter Bliss: That classic combo of butter and vanilla in the batter? It’s ridiculously comforting. The sugar caramelizes just enough to give it a subtle depth, while the vanilla lingers like a warm hug. Honestly, I’ve made this cake for years, and it’s still my go-to for pure, simple joy.
- Birthday Party Hero: You can bake this into letters for a themed cake, or just frost it normally for a crowd—it’s that adaptable. I’ve used it for toddler birthdays (with sprinkles, obviously) and even as a dessert at potlucks. The base recipe is foolproof, so you’re never stuck with a flop.
- Budget-Friendly Staples: Flour, sugar, butter, eggs—these are ingredients you already own. No fancy add-ins, no last-minute grocery runs. Between us, I’ve made this cake for under $5 per serving, and it still feels like a treat. Leftovers? They vanish in a day—trust me.
Step-by-step instructions for alphabet cake decoration
Here's how to transform simple cake layers into a vibrant, letter-filled masterpiece.
👨🍳 Step 1: Bake and Cool the Cake Layers
Preheat your oven to 350°F and grease two 8-inch round cake pans. In a large mixing bowl, cream together the 1 cup unsalted butter and 1.5 cups granulated sugar until light and fluffy, about 3-4 minutes. Add the 2 whole large eggs one at a time, mixing well after each addition.
In a separate bowl, whisk together the 2.5 cups all-purpose flour, 2 tsp baking powder, and 0.5 tsp salt. Gradually add the dry ingredients to the butter mixture along with the 1 tbsp vanilla extract and 0.5 cup milk, mixing just until combined. Divide the batter evenly between the prepared pans.
Bake for 25-30 minutes or until a toothpick inserted into the center comes out clean. Let the cakes cool in the pans for 10 minutes, then transfer to a wire rack to cool completely. Once fully cooled, level the tops if needed and trim any domed edges for even layers.
🍳 Step 2: Frost the Cake Layers
Place one cake layer on a cake stand or plate. Spread a thin layer of 1 cup buttercream frosting (about ¼ inch) over the top to create a "crumb coat." This thin layer helps prevent crumbs from getting into the final frosting.
Chill the cake in the refrigerator for 15 minutes to set the crumb coat. Remove from the fridge and apply the remaining 2 cups buttercream frosting evenly over the top and sides, creating a smooth surface. Repeat with the second cake layer, then place it on top of the first layer.
For the final frosting, spread another thin layer of buttercream over the top and sides of the stacked cake. Chill again for 15 minutes to firm up the frosting before adding decorations. This ensures your letters and fondant stay in place beautifully.
🥘 Step 3: Decorate with Letter Cookies and Fondant
Divide the 2 tbsp food coloring into small bowls for easy access. Using a small offset spatula or butter knife, spread a thin layer of buttercream over the top of the cake. Arrange the 24 pre-made letter cookies in a grid pattern or spell out a word, pressing them gently into the frosting.
For the fondant letters, roll out 1 lb fondant to about ¼-inch thickness and cut out letters using a letter cookie cutter or sharp knife. Knead a small amount of food coloring into each color of fondant to achieve vibrant hues. Press the fondant letters onto the cake around the pre-made letters, spacing them evenly.
Use a small amount of water on a clean pastry brush to gently smooth any fondant seams or imperfections. Let the fondant set for 10-15 minutes before adding any final details like edible glitter or small fondant accents for extra flair.
⏰ Step 4: Final Touches and Serving
Once all decorations are in place, let the cake rest at room temperature for 30 minutes to allow the frosting to fully set. This resting time ensures your letters stay securely attached and the cake holds its shape perfectly.
For a polished look, dust the cake with a light layer of powdered sugar using a fine-mesh sieve. Serve the alphabet cake at room temperature, cutting it into slices that reveal the colorful letter arrangement. This cake is perfect for celebrating birthdays, spelling games, or any occasion where playful, edible letters take center stage.
Pro Tips For Making Alphabet Cake
- Weigh Your Butter: I learned this the hard way—using scooped butter leaves you with a dry, crumbly cake. Pack that butter into a measuring cup and level it off for the right fat-to-flour ratio. (Yes, even if you're impatient like me.)
- Mix Just Until Combined: Overmixing turns alphabet cake into a dense brick. Stop as soon as the flour disappears—about 20 seconds after the dry ingredients blend. The batter should look shaggy, not smooth.
- Room-Temp Eggs Matter: Cold eggs won’t incorporate properly, leaving pockets of unmixed batter. Pop them in warm water for 5 minutes before cracking—this makes whipping them with butter and sugar far easier and more consistent.
- Don’t Overbake the Layers: The second the toothpick comes out clean is not the time to pull it. Alphabet cake dries out fast—aim for a springy center, even if it means pulling it at 325°F instead of 350°F. (Your future self will thank you.)
Troubleshooting your alphabet cake
Cake Didn't Rise
If your alphabet cake layers are flat or dense, check your baking powder first—old or expired leavening agent loses potency. I always test mine by mixing 1 tsp baking powder with ¼ cup hot water; it should bubble vigorously. Also ensure your butter is truly room temperature (press a finger in—it should leave a slight indent). Overmixing the batter after adding flour can also deflate air bubbles. For next time, mix just until combined (about 20 strokes after flour is added).
Frosting Too Soft
Buttercream that won’t hold its shape or slides off the cake? Chill your cake layers for 30 minutes before frosting to firm up the butter. If your kitchen is warm, chill the frosting in the fridge for 10-15 minutes before using. I recommend Wilton’s American-style buttercream for stability—it’s less prone to melting. For extra support, add 1 tbsp cornstarch to your frosting recipe to thicken it slightly.
Letters Falling Off
Pre-made letter cookies or fondant letters sliding? Your frosting might not be set enough. Always chill the cake between frosting layers for 15 minutes to create a sturdy base. For fondant letters, use a tiny dab of edible glue (like Wilton’s Edible Glue) on the back before pressing them onto the cake. Press gently but firmly—fondant needs a strong bond to stay put. Let the cake rest 30 minutes before serving to let the frosting fully harden.
Cracked Fondant
Fondant cracking or tearing when rolling or cutting? This usually means the fondant is too dry. Knead in 1 tsp vegetable shortening or a few drops of water to restore pliability. Work quickly—fondant dries out fast on countertops. For extra flexibility, roll fondant on a lightly floured surface (not too much flour, or it’ll be gritty). If cracks appear after placing letters, use a tiny bit of water on a pastry brush to smooth them out.
Uneven Cake Layers
Domed or uneven cake tops can throw off your letter arrangement. After baking, run a serrated knife horizontally across the top to level it. For extra insurance, chill the cake layers 1 hour before frosting—they’ll firm up and make stacking easier. If one layer is significantly thicker, trim the top with a sharp knife to match the other layer’s height. This ensures your letters sit flush and look professional.
Color Bleeding in Frosting
If your buttercream colors run together or look muddy, switch to gel food coloring (like Wilton or AmeriColor)—it’s more concentrated and won’t alter the frosting’s consistency. Divide your frosting into small bowls and tint each color separately. For vibrant letters, use ½ tsp gel coloring per cup of frosting and mix thoroughly. If colors still bleed, let the cake chill longer before adding decorations to set the frosting.
Nutrition facts
Frequently asked questions
Can I make this alphabet cake without letter cookies?
You have three great alternatives: pipe letters from frosting using a piping bag and round tip, use fondant letters (the recipe includes instructions), or even cut letters from colored sugar cookies baked separately. The frosting method is trickier but adds a fun DIY element for kids to help with.
How do I keep fondant from sticking to my rolling pin?
Lightly dust your rolling pin with cornstarch or powdered sugar before rolling, but don't overdo it—too much powder makes fondant gritty. Work quickly on a clean surface, and roll only when needed. For extra insurance, chill fondant for 10 minutes before rolling to prevent sticking.
What's the best way to spell a name with letters?
Start with the longest letter first (like 'A' or 'I') to create balance, then arrange shorter letters around it. For names with repeated letters (like "Anna"), use different colors for each instance to make them stand out. Place the name in the center of the cake for maximum impact!
Can I make this cake gluten-free?
Yes! Swap the all-purpose flour for a 1:1 gluten-free baking flour blend (like Bob's Red Mill or King Arthur). You may need to add 1 tsp xanthan gum to improve texture. Reduce milk by 2 tbsp since gluten-free flours absorb more liquid. Test with a small batch first to adjust consistency.
How far ahead can I prepare the cake decorations?
Pre-made letter cookies stay fresh 3 days in an airtight container, while fondant letters can be made 1 day ahead and stored wrapped in plastic. Frosting colors can be tinted 24 hours in advance and kept refrigerated. Assemble the cake 4 hours before serving to prevent letters from sliding.